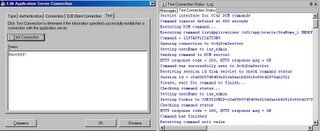
Thursday, March 23, 2006


Embedding customs Queries into Session EJB 3.0 based on Toplink POJOs


1. Create application workspace HRApps with Struts,JSP,ADF template.


2. Generate Toplink Mapping for project Model and two pojos

Employees.java and Departments.java for offline tables hr.employees,hr.departments.


3.Implement "Serializable" for both of created objects as follows:-


Public class Employees implements java.io.Serializable {

}
. . .

Public class Departments implements java.io.Serializable {

}
. . .


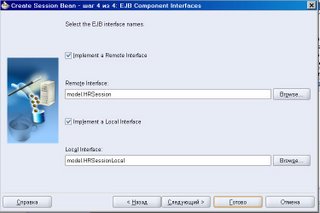
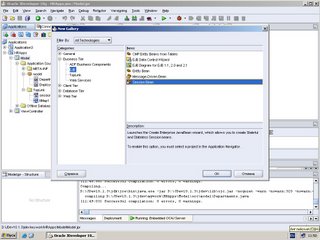
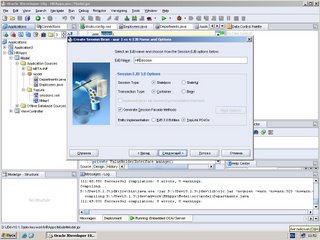
4. Invoke wizard for session EJB 3.0 creation.


Select Toplink POJOs.


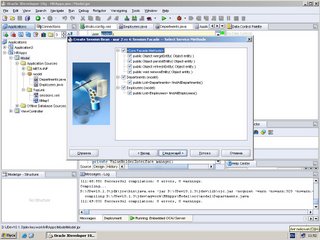
Generate all default methods suggested:


Select Remote and Local interface.

Otherwise you won't be able to create "New Sample Java Client"

when working with remote Oracle Database.


Right click on HRSessionBean and select "Create Data Control"


5.Add to HRSessionBean.java:-


public List findEmpInfo(String jobId) {
Session session = getSessionFactory().acquireSession();
Expression exp = new ExpressionBuilder().get("jobId").equal(jobId);
List results =(List) session.readAllObjects ( Employees.class,exp);
session.release();
return results;
}


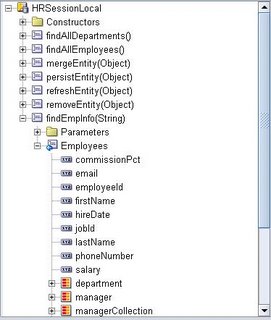
Switch to Structure Window;-

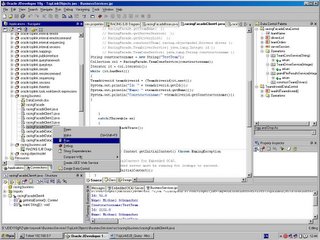
Right click on "findEmpInfo" node.Select Properties and select remote and local interface.

Recreate Data Control for HRSessionBean.

Create new sample Java Client and add right after
// hRSession.findEmpInfo( jobId ) to HRSessionClient.Java;


String custJobid = new String("IT_PROG");
java.util.List emps = hRSession.findEmpInfo(custJobid);
for (Employees emp : emps) {
System.out.println(emp.getEmployeeId()+ ":" + emp.getJobId() + ": " + emp.getLastName());
}


Run HRSessionBean and then run HRSessionClient . Watch report in log window.


Creating JSF page to perform custom query.


Create search form by dropping an existing method that contains

the logic to find and return the records based on parameters.

This method must already exist on the data control.


This method finds and returns all employees with desired "JobId"
To create the search form, drop the method as a parameter form. Then drop the returned collection as a table to display the results

To create a search form and results table:

1. From the Data Control Palette, drag a find method that takes parameters.

2. From the context menu, choose Parameters > ADF Parameter Form.

3. From the Data Control Palette, drag the return of that method and drop it as any type of table.


Create one more JSF page utilizing HRSessionBean's Data Controls based on automatically generated methods :


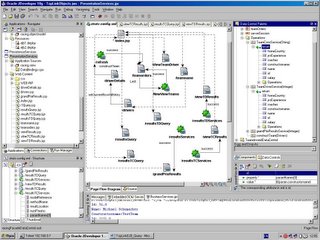
Now implement JSF Navigation cases:-


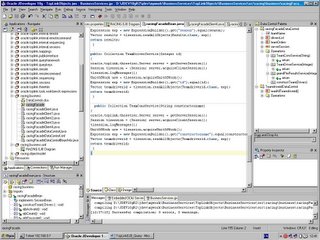
Run time screenshots of both pages of View Controller Project been deployed to OAS 10.1.3 on CentOS 4.1 (Linux) Box :


Sunday, March 19, 2006


Embedding custom Queries into Session EJB 3.0 based on Toplink POJOs in JDeveloper 10.1.3 environment.


1. Create application workspace HRApps with Struts,JSP,ADF template.


2. Generate Toplink Mapping for project Model and two pojos

Employees.java and Departments.java for offline tables hr.employees,hr.departments.


3.Implement "Serializable" for both of created objects as follows:-


Public class Employees implements java.io.Serializable {

}
. . .

Public class Departments implements java.io.Serializable {

}
. . .


4. Invoke wizard for session EJB 3.0 creation.


Select Toplink POJOs.


Generate all default methods suggested:


Select Remote and Local interface.

Otherwise you won't be able to create "New Sample Java Client"

when working with remote Oracle Database.


Right click on HRSessionBean and select "Create Data Control"


5.Add to HRSessionBean.java:-


public List findEmpInfo(String jobId) {
Session session = getSessionFactory().acquireSession();
Expression exp = new ExpressionBuilder().get("jobId").equal(jobId);
List results =(List) session.readAllObjects ( Employees.class,exp);
session.release();
return results;
}


Switch to Structure Window;-

Right click on "findEmpInfo" node.Select Properties and select remote and local interface.

Recreate Data Control for HRSessionBean.

Create new sample Java Client and add right after
// hRSession.findEmpInfo( jobId ) to HRSessionClient.Java;


String custJobid = new String("IT_PROG");
java.util.List emps = hRSession.findEmpInfo(custJobid);
for (Employees emp : emps) {
System.out.println(emp.getEmployeeId()+ ":" + emp.getJobId() + ": " + emp.getLastName());
}


Run HRSessionBean and then run HRSessionClient . Watch report in log window.


Creating JSF page to perform custom query.


Create search form by dropping an existing method that contains

the logic to find and return the records based on parameters.

This method must already exist on the data control.


This method finds and returns all employees with desired "JobId"
To create the search form, drop the method as a parameter form. Then drop the returned collection as a table to display the results

To create a search form and results table:

1. From the Data Control Palette, drag a find method that takes parameters.

2. From the context menu, choose Parameters > ADF Parameter Form.

3. From the Data Control Palette, drag the return of that method and drop it as any type of table.


Create one more JSF page utilizing HRSessionBean's Data Controls based on automatically generated methods :


Now implement JSF Navigation cases:-


Run time screenshots of both pages of View Controller Project been deployed to OAS 10.1.3 on CentOS 4.1 (Linux) Box :


Wednesday, February 22, 2006


Embedding Toplink Queries into Session EJB in JDeveloper 10.1.2 environment.


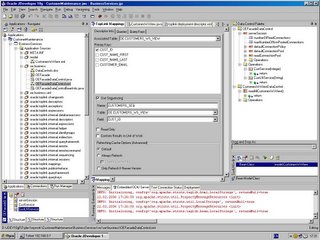
Suppose that JSP displaying Customer_WS_VIEW based on Toplink mapping

exactly as in [1] has been created.

Stop doing workshop [1] and switch to adding Session EJB to CustomerMaintenance

Workspace with intend to encapsulate into newly created OEFacade (SessionEJB) methods

performing queries against Customer_WS_VIEW based on Toplink API


1.Select CustomerMaintenance Workspace and right click on it.

In the New Gallery, select Empty Project in the Items list and click OK.

In the Create Project dialog, rename the project as BusinessServices and click OK.


Common > Input Paths > Default Package: oe.business

Common > Dependencies: ViewController.jpr ,Model.jpr

Common > Technology Scope


Select Enterprise JavaBeans in the Available Technologies and click the shuttle button

to move to Selected Technologies


Libraries:

Select TopLink in the Available Libraries and click the shuttle button to move to Selected Libraries


2.In the Applications Navigator, right-click the BusinessServices project and choose New from the context menu.

In the New Gallery, expand the Business Tier node in the Categories list and select Enterprise JavaBeans.

In the Items list, select EJB Diagram and click OK.

In the Create EJB Diagram dialog, set the following:


Name: OE EJB Diagram

Package: oe.business.uml


In the Component Palette, select Session Bean and click on the EJB Diagram surface.

(If the Component Palette is not visible, launch it by choosing

View | Component Palette from the menu.) Skip the Welcome page,

and in Step 1 of 4 of the Create Enterprise JavaBean Wizard,

select Enterprise JavaBeans 2.0 from the drop down list, then click Next.

In Step 2 of 4 of the wizard, rename the EJB as OEFacade, then click Next.

In Step 3 of 4 of the wizard, accept the defaults and click Next.In Step 4 of 4

of the wizard, select both check boxes to include both types of interfaces (local and remote),

click Next, and then click Finish on the summary page.


3. In the Model project, select CustomersWsView.java in the model

package and choose Tools | Implement Interface.... from the menu.


From the Available interface list select the java.io.Serializable class and click OK.

Click the Save All button to save your work.


4. In the EJB Diagram, double-click the OEFacade EJB to launch the EJB Module editor.

Select OEFacade : Methods in the left hand navigator

On the right hand side panel , choose Business Methods in Method category and click Add.

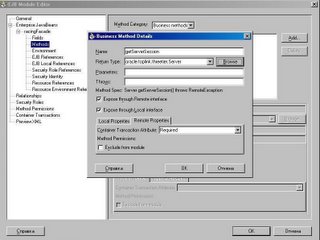
In the Business Method Details dialog, set the following method :


Name : getServerSession
Return type: oracle.toplink.threetier.Server
Select both :Expose through Local & Remote interfaces


Go to OEFacade Bean Class and add:-


public void setServerSession(Server serverSession)
{
//this.serverSession = serverSession;
ServerSession aSession = (ServerSession)SessionManager.getManager().getSession("ServerSession");
}

public Server getServerSession()
{
String tl_ddFileName =
"/META-INF/Model/toplink-deployment-descriptor.xml";
ClassLoader appClassLoader = Thread.currentThread().getContextClassLoader();
oracle.toplink.sessions.Project project = XMLProjectReader.read(tl_ddFileName,
appClassLoader);
DatabaseLogin loginInfo = project.getLogin();
loginInfo.getPlatform().getConversionManager().setLoader(appClassLoader);
oracle.toplink.threetier.Server server = project.createServerSession();
server.login();
return server;
}


In the EJB Diagram, double-click the OEFacade EJB to launch the EJB Module editor.

Select OEFacade : Methods in the left hand navigator

On the right hand side panel , choose Business Methods in Method category and click Add.

In the Business Method Details dialog, set the following method


Name: CustService
Return Type: java.util.Collection
Parameters: Integer custId
Select both :Expose through Local & Remote interfaces


Go to OEFacade Bean Class and add:-


public Collection CustService(Integer custId)
{
oracle.toplink.threetier.Server server = getServerSession();
Session tlsession = (Session) server.acquireClientSession();
tlsession.logMessages();
UnitOfWork uow = tlsession.acquireUnitOfWork();
Expression exp = new ExpressionBuilder().get("custId").equal(custId);
Vector customerswsview = tlsession.readAllObjects(CustomersWsView.class, exp);
return customerswsview;
}


In the EJB Diagram, double-click the OEFacade EJB to launch the EJB Module editor.

Select OEFacade : Methods in the left hand navigator

On the right hand side panel , choose Business Methods in Method category and click Add.

In the Business Method Details dialog, set the following method :


Name: CustLNService
Return Type: java.util.Collection
Parameters: String custNameLast
Select both :Expose through Local & Remote interfaces


Go to OEFacade Bean Class and add:-


public Collection CustLNService(String custNameLast)
{
oracle.toplink.threetier.Server server = getServerSession();
Session tlsession = (Session) server.acquireClientSession();
tlsession.logMessages();
UnitOfWork uow = tlsession.acquireUnitOfWork();
Expression exp = new ExpressionBuilder().get("custNameLast ").like(custNameLast);
Vector customerswsview = tlsession.readAllObjects(CustomersWsView.class, exp);
return customerswsview;
}


1. Create Data Control for Racing Façade EJB

2. Click on OEFacadeDataControl.xml and switch to Structure window.

3. Define java bean for nodes CustService and CustNLService as model.CustomersWsView.java


Data Controls should be fine now


Test method been added:-


Create new client OEFacadeClient.java.

Add to OEFacadeClient.java:


String custNameLast = new String(“%S%”);

Collection col = oEFacade.CustLNService(custNameLast);
Iterator it = col.iterator();
while (it.hasNext())
{
CustomersWsView customerswsview = (CustomersWsView)it.next();
System.out.println("Id: " + customerswsview. getCustId());
System.out.println("First Name: " + customerswsview. getCustNameFirst ());
System.out.println("Last Name: " + customerswsview. getCustNameLast ());
}

import java.util.Collection;
import java.util.Iterator;
import model.CustomersWsView;


References.

Building Oracle ADF Applications: Workshop

1.http://www.oracle.com/technology/obe/obe9051jdev/ide1012/adfworkshop/buildingadfapplicationsworkshop.htm


Wednesday, February 01, 2006


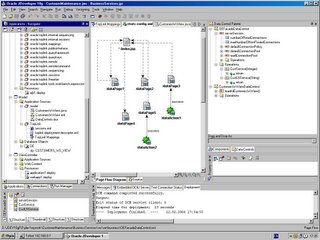
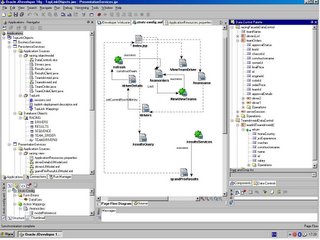
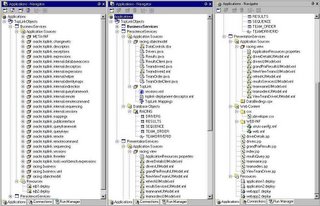
Deployment Presentation Services Project (OTN's Jdeveloper Tutorial Pages ) to remote OC4J instance on Linux Box (CentOS 4.1)


Project described in [1],[2] has been modified to work as standalone OC4J's
Web Application in UNIX/LINUX enviromment.

Modify file:

C:\JDEV10gR2\jdev\mywork\BusinessServices\TopLinkObjects\Project\toplink-mapping.mwp

to replace "localhost:1521:ORCL" with real connecting string to remote database .

For example : "ServerCentOS41:1523:rawdbase"

Then start Jdeveloper 10.1.2 and open project ToplinkObjects.jws

Just to be able to acquire database Server Session add view :-


create view TeamDriverID as
select a.id,a.constructorname,b.homeCountry,b.yrsExperience,b.name,b.salary
from team_order a,drivers b
where a.driver1_id=b.id
order by a.constructorname


to RACING schema.

Import View TeamDriverID as Toplink Java object to PersistenceServices.jpr

Regenerate Toplink-Deployment-Descriptor.

Create new session.xml and define data control for TeamDriverID.java though session.xml file.


Performing following step from [1] :-


Add a Method to Get a Server Session
1.In the EJB Diagram, double-click racingFacade EJB to launch the EJB Module editor.

2.Expand racingFacade in the left hand navigator and select Methods. On the right hand side panel,choose Business Methods in the Method category and click Add.

3.In the Business Method Details dialog set the following:
Name getServerSession
Return Type oracle.toplink.threetier.Server

// Deselect the check boxes for Expose through Remote Interface and Expose through Local Interface.


Do select the check boxes for Expose through Remote Interface and Expose through.Local Interface.


Click OK, then click OK in the EJB Module Editor.


4.Right-click racingFacade EJB in the Applications Navigator and choose Go To Bean Class from the context menu.

The section shown bellow (inside RacingFacadeBean.java file) should be modified as follows:-


public void setServerSession(Server serverSession)
{
//this.serverSession = serverSession;
ServerSession aSession = (ServerSession)SessionManager.getManager().getSession("ServerSession");
}


Keep getServerSession() method exactly as advised in [1]:


public Server getServerSession()
{
String tl_ddFileName ="/META-INF/PersistenceServices/toplink-deployment-descriptor.xml";
ClassLoader appClassLoader = Thread.currentThread().getContextClassLoader();
oracle.toplink.sessions.Project project = XMLProjectReader.read(tl_ddFileName,appClassLoader);
DatabaseLogin loginInfo = project.getLogin();
loginInfo.getPlatform().getConversionManager().setLoader(appClassLoader);
oracle.toplink.threetier.Server server = project.createServerSession();
server.login();
return server;
}


Add the following import statements:

import oracle.toplink.sessions.DatabaseLogin;

import oracle.toplink.tools.workbench.XMLProjectReader;

Then run RacingFacadeClient1.Java.It will successfully acquire the Unit Of Work

and add the row to "team_order" table on remote database server.

Proceed with working on project as advised in [1],[2]


Create ejb1.deploy as EJB deployment profile for BusinessServices.jpr for standalone OC4J.

Create webapp1.deploy as WAR deployment profile for PresentationServices.jpr for standalone OC4J.

Create application1.deploy as EAR deployment profile for PresentationServices.jpr for standalone OC4J.

Application Assembly should include both ejb1.deploy,webapp1.deploy.

At this point project may be deployed to remote OC4J instance or OAS10gR2
(J2EE&WebCashe) on Linux Box and work with remote box hosting
Oracle 9i or 10g database on Linux,exactly as it works with local database on Windows.


Adding new Toplink Query against view TeamDriverID to RacingFacade EJB


1.In the PersistenceServices project, select Teamdriverid.java in the racing.objectmodel

package and choose Tools | Implement Interface.... from the menu.

From the Available interface list select the java.io.Serializable class and click OK.

Click the Save All button to save your work.


2. In the EJB Diagram, double-click the racingFacade EJB to launch the EJB Module editor.

Select racingFacade > Methods in the left hand navigator

On the right hand side panel , choose Business Methods in Method category and click Add.

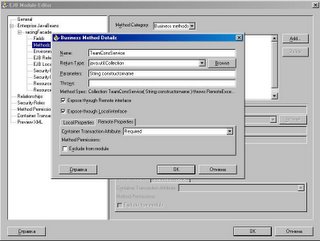
In the Business Method Details dialog, set the following:


Name: TeamConsService

Return Type: java.util.Collection

Parameters: String constructorname


Select the checkboxes for Expose through Remote Interface and Expose

through Local Interface. Click OK, then click OK in the EJB Module editor.


3. Add to RacingFacadeBean.java Class :


public Collection TeamConsService(String constructorname)
{
oracle.toplink.threetier.Server server = getServerSession();
Session tlsession = (Session) server.acquireClientSession();
tlsession.logMessages();
UnitOfWork uow = tlsession.acquireUnitOfWork();
Expression exp = new ExpressionBuilder().get("constructorname").equal(constructorname);
Vector teamdriverid = tlsession.readAllObjects(Teamdriverid.class, exp);
return teamdriverid;
}


1. Recreate Data Control for Racing Facade EJB

2. Click on RacingFacadeDataControl.xml and switch to Structure window.

3. Redefine java beans for nodes TeamDriverService ,TeamConsService,

GrandPrixResultsService in Structure window


Data Controls should be fine now


Create new client RacingFacadeClient3.java:

Add right bellow // RacingFacade.constructTeam( racing.objectmodel.Drivers driver ):

in RacingFacadeClient3.java


String constructorname = new String("TestTeam");
Collection col = RacingFacade.TeamConsService(constructorname);
Iterator it = col.iterator();
while (it.hasNext())
{
Teamdriverid teamdriverid = (Teamdriverid)it.next();
System.out.println("Id: " + teamdriverid.getId());
System.out.println("Name: " +teamdriverid.getName());
System.out.println("Constructorname:" +teamdriverid.getConstructorname());
}

import java.util.Collection;
import java.util.Iterator;
import racing.objectmodel.Teamdriverid;


Right click on RacingFacadeClient3.java and watch log window.


One more sample:-

In the EJB Diagram, double-click the racingFacade EJB to launch the EJB Module editor.

Select racingFacade > Methods in the left hand navigator

On the right hand side panel , choose Business Methods in Method category and click Add.

In the Business Method Details dialog, set the following:


Name: TeamCons2Service

Return Type: java.util.Collection

Parameters: String constructorname ,String name


Select the checkboxes for Expose through Remote Interface and Expose

through Local Interface. Click OK, then click OK in the EJB Module editor.

Add to RacinFacade bean Class


public Collection TeamCons2Service(String constructorname, String name)
{
oracle.toplink.threetier.Server server = getServerSession();
Session tlsession = (Session) server.acquireClientSession();
tlsession.logMessages();
UnitOfWork uow = tlsession.acquireUnitOfWork();
Expression exp1 = new ExpressionBuilder().get("constructorname").like(constructorname);
Expression exp2 = new ExpressionBuilder().get("name").like(name);
Vector teamdriverid = tlsession.readAllObjects(TeamdriverId.class, exp1.and(exp2));
return teamdriverid;
}


Create new client RacingFacadeClient.java

Add right bellow comment

// RacingFacade.constructTeam( racing.objectmodel.Drivers driver )


String constructorname = new String("%A%");
String name = new String("%Ralf%");
Collection col = RacingFacade.TeamCons2Service(constructorname,name);
Iterator it = col.iterator();
while (it.hasNext())
{
TeamdriverId teamdriverid = (TeamdriverId)it.next();
System.out.println("Id: " + teamdriverid.getId());
System.out.println("Name: " +teamdriverid.getName());
System.out.println("Constructorname:" +teamdriverid.getConstructorname());
}


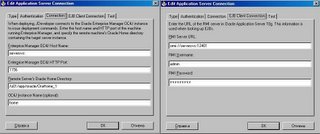
In case of deployment to OAS 10.1.2 the URL for RMI Server

should contain port value 12401. It's important when looking up EJBs


References:

1.Create Business Services using Enterprise JavaBeans

http://www.oracle.com/technology/obe/obe_as_1012/j2ee/develop/business/businessservices_obe/businessservices.html

2.Create Presentation Services Using JSP pages, Struts and ADF Databinding

http://www.oracle.com/technology/obe/obe_as_1012/j2ee/develop/client/presentationservices_obe/presentationservices.htm

Wednesday, November 23, 2005


Oracle 10g R2 Automatic Storage Management on CentOS 4.1 (RHEL AS 4 U1)


The target of publication is to highlight the optimal sequence of steps
required to bring Oracle10g (10.2.0.1) ASM-database up on CentOS4.1,
placing ASM instance and serviced databases in different Oracle Homes.
Oracleasm library install is done immediately after creating "oracle"
linux account and "dba" group to be ready for ASM Instance creating during
the first Installer run supposed to build it. ASM instance for disks and disk’s
group management is created the first by Installer along with the disk’s group
for database supposed to be built during the second run of Installer and to be
placed into recently created disk’s group.

I. Oracle 10gR2 ASM and ASMLib 2.0 I/O.

1.Install CentOS 4.1 (just everything about 6 GB)

2.Run as root:


# groupadd dba # group of users to be granted SYSDBA system privilege
# groupadd oinstall # group owner of Oracle files
# useradd -c "Oracle software owner" -g oinstall -G dba oracle
# passwd oracle
# mkdir -p /u01/app/oracle
# chown -R oracle.oinstall /u01
# mkdir -p /u02/oradata/wtfdata
# chown -R oracle.oinstall /u02


OTN instruction:-
Before installing Automatic Storage Management, it is recommended that you install
the optional add-on Automatic Storage Management support library, ASMLib.
ASMLib is an application program interface (API) Oracle that is aimed at simplifying
the interface between the operating system and the database, and to exploit
the capabilities and strengths of storage arrays provided by different vendors.
ASMLib provides an alternative interface for the Automatic Storage Management-enabled kernel to discover and access block devices. It provides storage and operating system vendors the opportunity to supply extended storage-related features.
These features provide benefits such as improved performance and greater data integrity.
OTN instruction ends.


3.To install ASMLIB 2.0 run as root:-


# rpm -Uvh oracleasm-2.6.9-11.ELsmp-2.0.0-1.i686.rpm oracleasmlib-2.0.0-1.i386.rpm oracleasm-support-2.0.0-1.i386.rpm


Now you get /etc/init.d/oracleasm ready to go.

Configuring the Oracle ASM library driver:-


# /etc/init.d/oracleasm configure
Default user to own the driver interface [oracle]: oracle
Default group to own the driver interface [dba]: dba
Start Oracle ASM library driver on boot (y/n) [y]: y
Fix permissions of Oracle ASM disks on boot (y/n) [y]: y
Writing Oracle ASM library driver configuration: [ OK ]
Scanning system for ASM disks: [ OK ]


# /etc/init.d/oracleasm enable


Create ASM disks as desired utilizing command:


# /etc/init.d/oracleasm createdisk VLM0X /dev/sdx


Tune /etc/sysctl.conf,/etc/security/limits.conf,/etc/pam.d/login, /etc/profile
and oracle's shell environment as advised in [1].

Login as oracle:-


$ cd /tmp/database
$./runInstaller


OTN instructions:-
It’s recommended that you install Automatic Storage Management in its own Oracle home, regardless of whether you plan to only have one or multiple database instances.
Installing Automatic Storage Management in its own Oracle home helps ensure higher
availability and manageability.With separate Oracle homes, you can upgrade Automatic Storage Management and databases independently, and you can remove database software without impacting the Automatic Storage Management instance. Ensure that the Automatic Storage Management version is the same or later than the Oracle Database version.If an Automatic Storage Management installation does not already exist and you select the Oracle Universal Installer option to install and configure Automatic Storage Management only, then Oracle Universal Installer installs Automatic Storage Management in its own Oracle home.
OTN instruction ends.


Select option "Advanced installation" and create ASM instance in
ORACLE_HOME=/u01/app/oracle/oracle/product/10.2.0/db_1.
Create first disk group on the box during this run . Exit installer.


$ ./runInstaller


Select option "Advanced installation" and create new ASM-database placed into existing disk's group
in ORACLE_HOME=/u01/app/oracle/oracle/product/10.2.0/db_2 .
Modify ~oracle/.bash_profile correspondently. Relogin as oracle.

Next:-


$ sqlplus /nolog
SQL> conn / as sysdba
Connected.
SQL> shutdown immediate;
Database closed.
Database dismounted.
ORACLE instance shut down.
SQL> startup mount;
ORACLE instance started.

Total System Global Area 285212672 bytes
Fixed Size 1218968 bytes
Variable Size 88082024 bytes
Database Buffers 188743680 bytes
Redo Buffers 7168000 bytes
Database mounted.

SQL> alter database archivelog;
Database altered.
SQL> alter database MastDB flashback on;
Database altered.
SQL> alter database open;
Database altered.


Open Enterpise Manager console.(Enterprise Manager 10g Database Control URL

http://ServerCentOS41:1158/em). Create new disk's group for flashback

recovery area and modify corresponding value on Recovery Settings page of EM.


# !/bin/bash
###################
# lsnrstart script
###################
export ORACLE_HOME=/u01/app/oracle/product/10.2.0/db_1
lsnrctl start
export ORACLE_HOME=/u01/app/oracle/product/10.2.0/db_2
lsnrctl start


System startup in this case should look like:-


[oracle@ServerCentOS41 ~]$ ./lsnrstart
LSNRCTL for Linux: Version 10.2.0.1.0 - Production on 30-AUG-2005 17:57:41
Copyright (c) 1991, 2005, Oracle. All rights reserved.
Starting /u01/app/oracle/product/10.2.0/db_1/bin/tnslsnr: please wait...
TNSLSNR for Linux: Version 10.2.0.1.0 - Production
System parameter file is /u01/app/oracle/product/10.2.0/db_1/network/admin/listener.ora
Log messages written to /u01/app/oracle/product/10.2.0/db_1/network/log/listener.log
Listening on: (DESCRIPTION=(ADDRESS=(PROTOCOL=tcp)(HOST=ServerCentOS41)(PORT=1521)))
Listening on: (DESCRIPTION=(ADDRESS=(PROTOCOL=ipc)(KEY=EXTPROC1)))
Connecting to (DESCRIPTION=(ADDRESS=(PROTOCOL=TCP)(HOST=ServerCentOS41)(PORT=1521)))
------------------------
STATUS of the LISTENER
------------------------
Alias LISTENER
Version TNSLSNR for Linux: Version 10.2.0.1.0 - Production
Start Date 30-AUG-2005 17:57:42
Uptime 0 days 0 hr. 0 min. 0 sec
Trace Level off
Security ON: Local OS Authentication
SNMP OFF
Listener Parameter File /u01/app/oracle/product/10.2.0/db_1/network/admin/listener.ora
Listener Log File /u01/app/oracle/product/10.2.0/db_1/network/log/listener.log
Listening Endpoints Summary...
(DESCRIPTION=(ADDRESS=(PROTOCOL=tcp)(HOST=ServerCentOS41)(PORT=1521)))
(DESCRIPTION=(ADDRESS=(PROTOCOL=ipc)(KEY=EXTPROC1)))
Services Summary...
Service "PLSExtProc" has 1 instance(s).
Instance "PLSExtProc", status UNKNOWN, has 1 handler(s) for this service...
The command completed successfully

LSNRCTL for Linux: Version 10.2.0.1.0 - Production on 30-AUG-2005 17:57:42
Copyright (c) 1991, 2005, Oracle. All rights reserved.
Starting /u01/app/oracle/product/10.2.0/db_2/bin/tnslsnr: please wait...
TNSLSNR for Linux: Version 10.2.0.1.0 - Production
System parameter file is /u01/app/oracle/product/10.2.0/db_2/network/admin/listener.ora
Log messages written to /u01/app/oracle/product/10.2.0/db_2/network/log/listener.log
Listening on: (DESCRIPTION=(ADDRESS=(PROTOCOL=tcp)(HOST=ServerCentOS41)(PORT=1522)))
Listening on: (DESCRIPTION=(ADDRESS=(PROTOCOL=ipc)(KEY=EXTPROC2)))
Connecting to (DESCRIPTION=(ADDRESS=(PROTOCOL=TCP)(HOST=ServerCentOS41)(PORT=1522)))
------------------------
STATUS of the LISTENER
------------------------
Alias LISTENER
Version TNSLSNR for Linux: Version 10.2.0.1.0 - Production
Start Date 30-AUG-2005 17:57:42
Uptime 0 days 0 hr. 0 min. 0 sec
Trace Level off
Security ON: Local OS Authentication
SNMP OFF
Listener Parameter File /u01/app/oracle/product/10.2.0/db_2/network/admin/listener.ora
Listener Log File /u01/app/oracle/product/10.2.0/db_2/network/log/listener.log
Listening Endpoints Summary...
(DESCRIPTION=(ADDRESS=(PROTOCOL=tcp)(HOST=ServerCentOS41)(PORT=1522)))
(DESCRIPTION=(ADDRESS=(PROTOCOL=ipc)(KEY=EXTPROC2)))
Services Summary...
Service "PLSExtProc" has 1 instance(s).
Instance "PLSExtProc", status UNKNOWN, has 1 handler(s) for this service...
The command completed successfully


[oracle@ServerCentOS41 ~]$ dbstart

Processing ASM instance "+ASM": log file /u01/app/oracle/product/10.2.0/db_1/startup.log
Processing Database instance "MastDB": log file /u01/app/oracle/product/10.2.0/db_2/startup.log
[oracle@ServerCentOS41 ~]$ emctl start dbconsole


TZ set to US/Eastern
Oracle Enterprise Manager 10g Database Control Release 10.2.0.1.0
Copyright (c) 1996, 2005 Oracle Corporation. All rights reserved.
http://ServerCentOS41:1158/em/console/aboutApplication
Starting Oracle Enterprise Manager 10g Database Control .............. started.
-------------------------------------------------------------------------------
Logs are generated in directory /u01/app/oracle/oracle/product/10.2.0/db_2/ServerCentOS41_MastDB/sysman/log


Install described above was done with different Oracle Homes

for ASM instance and ASM-database.

To put ASM instance and ASM-database in same Oracle Home.

Start runInstaller just once to build all stuff at a time.

Login as oracle:-


$ cd /tmp/database
$./runInstaller


Select option "Advanced option" and install "Software only"

in ORACLE_HOME - /u01/app/oracle/oracle/product/10.2.0/db_1.
Modify oracle's .bash_profile:-
export ORACLE_HOME and new PATH.
Source new .bash_profile:-


$. ~oracle/.bash_profile
$dbca


During this run the request to start CSS daemons by root will come up.


# $ORACLE_HOME/bin/localconfig add


ASM instance , needed disk's groups and ASM-database itself will be created.
Then perform listener and local TNS names configuration.


$netca


II. Oracle 10gR2 ASM and Standard Linux I/O.


This method creates Oracle database files on raw character devices managed by ASM
using standard Linux I/O system calls.It requires to create RAW devices for all
disk partitions used by ASM.


1.Install CentOS 4.1 (just everything about 6 GB)

2.Run as root:


# groupadd dba # group of users to be granted SYSDBA system privilege
# groupadd oinstall # group owner of Oracle files
# useradd -c "Oracle software owner" -g oinstall -G dba oracle
# passwd oracle
# mkdir -p /u01/app/oracle
# chown -R oracle.oinstall /u01
# mkdir -p /u02/oradata/data
# chown -R oracle.oinstall /u02


Just as an example create 4 partitions:

/dev/hda6,/dev/hdc6 5 GB each one

/dev/hda7,/dev/hdc7 3 GB each one

Create raw devices modifying file /etc/sysconfig/rawdevices as follows:

/dev/raw/raw1 /dev/hda6

/dev/raw/raw2 /dev/hdc6

/dev/raw/raw3 /dev/hda7

/dev/raw/raw4 /dev/hdc7

Put in /etc/rc.d/rc.local

chown oracle:dba /dev/raw/raw*

chmod 660 /dev/raw/raw*

I was experiencing problems with loosing "oracle:dba" permissions after Linux
reboot. Oracle's raw device came up with "root:disk" ownership after reboot.


Restart Linux

Run as root:-


# service rawdevices restart


Tune /etc/sysctl.conf,/etc/security/limits.conf,/etc/pam.d/login,

/etc/profile and oracle's shell environment as advised in [1].


Login as oracle:-


$ cd /tmp/database
$./runInstaller


Select " Advanced installation" and
create ASM instance in ORACLE_HOME=/u01/app/oracle/oracle/product/10.2.0/asm
During this run create diskgroup RAWDATA1 with normal redundancy
mirroring /dev/raw/raw1 and /dev/raw/raw2.You should be fine with discovering raw devices unless permissions "oracle:dba" are lost
Exit installer.

Export ORACLE_HOME for ASM instance and corresponding PATH.
Then run "dbca" to create diskgroup RAWDATA2 with
normal redundancy mirroring /dev/raw/raw3 and /dev/raw/raw4

  
$ ./runInstaller


Select " Advanced installation" and create new ASM-database placed RAWDATA1 diskgroup

in $ORACLE_HOME=/u01/app/oracle/oracle/product/10.2.0/db_1.
Modify ~oracle/.bash_profile correspondently.Relogin as oracle.
Next:-


$ sqlplus /nolog
SQL> conn / as sysdba
Connected.
SQL> shutdown immediate;
Database closed.
Database dismounted.
ORACLE instance shut down.
SQL> startup mount;
ORACLE instance started.
Total System Global Area 285212672 bytes
Fixed Size 1218968 bytes
Variable Size 88082024 bytes
Database Buffers 188743680 bytes
Redo Buffers 7168000 bytes
Database mounted.
SQL> alter database archivelog;
Database altered.
SQL> alter database rawdbs flashback on;
Database altered.
SQL> alter database open;
Database altered.


Open Enterpise Manager console.(Enterprise Manager 10g Database Control

URL http://ServerCentOS41:1158/em). Put flashback recovery area in RAWDATA2

modifying corresponding value on Recovery Settings page of EM.


References.

1.www.puschitz.com/InstallingOracle10g.shtml

Tuesday, November 15, 2005


On-line disaster-Recovery Procedure for crashed IBM Informix Enterprise Replication Server 9.2(3,4)


Assume that g_cp ,g_fw ,g_tp ,g_sc are Enterprise Replication servers participating in Update Anywhere Enterprise Replication. All of them are based Informix Dynamic Server 9.2UC2 Hardware platform: RS/6000,AIX 4.3 (4 CPU’s, 2 GB of RAM).
Server_xx is a host name for corresponding ER Server g_xx and corresponds entry
in SQLHOSTS file on each one of ER servers.At certain point of time ER server g_cp crashes(we presume that Informix Dynamic Server on server_cp is still alive, otherwise first delete is not necessary),then issue on server_cp:


informix@server_cp$ cdr delete server g_cp
issue on server_tp (or any other g_cp,g_fw,g_sc):
informix@server_tp$ cdr delete server g_cp -connect server_tp


The first command removes ER server from local global catalog
and removes the ER connections to others hosts.
The second command removes ER server from all other syscdr
databases, i.e. from all other ER servers on the system

When server_cp is ready to go:-


informix@server_cp$ cdr def server -connect server_cp -I -S g_tp g_cp -A $INFORMIXDIR/ats -R $INFORMIXDIR/ris

-A option defines Aborted Transaction Spooling Directory;
-R option defines Row Information Spooling Directory


Declare Replications on g_cp ,run script change_repl.ksh:-


#!/usr/bin/ksh
for TABLE in `cat table_list`
do
cdr change replicate -a repl_${TABLE} sitesdata@server_cp:informix.${TABLE} "select * from ${TABLE}"
if [ $? == 0 ] then
echo "repl _"${TABLE}" updated OK"
else
echo "repl_"$(TABLE}" update failed"
exit 1
fi
done


Start Replications on g_cp ,run script start_repl.ksh:-


#!/usr/bin/ksh
for TABLE in `cat table_list`
do
cdr start replication repl_${TABLE} g_cp
if [ $? == 0 ] then
echo "repl_"${TABLE}" started OK"
else
echo "repl_"${TABLE}" start failed"
exit 1
fi
done


Suspend all ER servers , run command:-


informix@server_cp$ cdr suspend server g_cp g_tp g_fw g_sc


Since this moment all transactions will be queued but not replicated
Run script unload.ksh on server_tp (g_tp) :-


informix@server_tp$ nohup onpunload.ksh>unload.log 2>&1 &

#!/usr/bin/ksh
#####################################################################
# onpunload.ksh. Script invokes onpload utility
# to unload data on any running ER server
# For each TABLE value in table_list file:
# unload job named unload_${TABLE} for each replicated table is already
# created in HPL environment and stored in onpload database.
# Autogenerate Load Components panel
# configured output file as /dataserver/unload/${TABLE}.dat,
# target database name
# as "sitesdata" and table as ${TABLE}
#######################################################################
for TABLE in `cat table_list`
do
onpload –p sites –j unload_${TABLE} -fu
if [ $? == 0 ] then
echo "repl_"${TABLE}" unloaded OK"
else
echo "repl_"${TABLE}"unload failed"
exit 1
fi
done


Compress all unloaded ASCII files ,create tar ball and download to
/dataserver/load on server_cp.Untar ball and uncompress *.Z files
in /dataserver/load directory on server_cp,
then run script to load data.


informix@server_cp$ nohup onpload.ksh>load.log 2>&1 &

#!/usr/bin/ksh
###############################################################################
# onpload.ksh
# Script invokes onpload utility to load data on ER server
# supposed to be synchronized.
# For each TABLE value in table_list file:
# load job named load_${TABLE} for each replicated table is already created with
# Deluxe without replication menu option in High Performance Loader Environment
# and stored in onpload database. This feature became available since HPL v 9.2
# Autogenerate Load Components panel configured input file as #dataserver/load/
#${TABLE}.dat,
# target database “sitesdata” and table as ${TABLE}
################################################################################
for TABLE in `cat table_list`
do
onpload –p sites j –load_${TABLE} -fcl
if [ $? == 0 ] then
echo ${TABLE}" loaded OK"
else
echo ${TABLE}" load failed"
exit 1
fi
done


To start replication of queued transactions run command:-

   
informix@server_tp$ cdr resume server g_cp g_tp g_fw g_sc


Since this point system is passing through extremely dangerous phase.
Transaction rate could be very high on each one of ER servers involved
into Udate-Anywhere Enterprise Replication. Sizes of send and receive dbspaces
as well as total length Logical Logs should be tuned very carefully to accommodate
OLTP hit. LTXHWM must be more then 2*LTHWM, i.e long transaction should be
rollbacked before LTXHWM is reached.DDR threads could several times start and finish
catch up phase on g_cp (especially),g_fw,g_tp,g_sc.
This behavior is normal during synchronizing

Monday, November 14, 2005


Multithreaded HTTP Server for Linux built up by the pool of threads utilizing select()system call.


Developing code bellow we follow general guidelines from [1] chapter 11.
The only one source file has been modified is server.c.Instead of fork new process to handle each incoming client's connection, as procedure server_run ( ) does in [1], we start pool of 1024 threads accepting as parameter descriptor of passive socket.The procedure run by each thread is asynchronous BSD socket’s server utilizing select() system
call (see for example [2],chapter 13(5)) to switch between handling incoming client's requests by accept() system call
and receiving "http" requests from clients already connected to server utilizing procedures handle_request() and
handle_get() from [1],chapter 11.

References.

1.Mark Mitchel,Jeffrey Oldham,Alex Samuel. Advanced Linux Programming.

New Riders Publishing , 2001. www.advancedlinuxprogramming.com

2.Douglas E. Comer,David L. Stevens Internet Working with TCP/IP ,vol 3

Client-Server Programming and application Linux/Posix Socket Version,Prentice Hall,Inc. 2001


/*
* server.c module :- multithreaded version, starting pool of threads,
* multiplexing select() system call, to serve new connections
* utilizing accept() system call and "http" responds for clients
* already connected to server simultaneously.
*/

#include <arpa/inet.h>
#include <assert.h>
#include <errno.h>
#include <netinet/in.h>
#include <signal.h>
#include <stdio.h>
#include <string.h>
#include <sys/types.h>
#include <sys/socket.h>
#include <sys/wait.h>
#include <unistd.h>
#include <pthread.h>
#include "server.h"
#define NUM_THREADS 1024

pthread_mutex_t get_mutex=PTHREAD_MUTEX_INITIALIZER;

static char* not_found_response_template =
"HTTP/1.0 404 Not Found\n"
"Content-type: text/html\n"
"\n"
"<html>\n"
" <body>\n"
" <h1>Not Found</h1>\n"
" <p>The requested URL %s was not found on this server.</p>\n"
" </body>\n"
"</html>\n";


static char* bad_method_response_template =
"HTTP/1.0 501 Method Not Implemented\n"
"Content-type: text/html\n"
"\n"
"<html>\n"
" <body>\n"
" <h1>Method Not Implemented</h1>\n"
" <p>The method %s is not implemented by this server.</p>\n"
" </body>\n"
"</html>\n";
static char* ok_response =
"HTTP/1.0 200 OK\n"
"Content-type: text/html\n"
"\n";

static char* bad_request_response =
"HTTP/1.0 400 Bad Request\n"
"Content-type: text/html\n"
"\n"
"<html>\n"
" <body>\n"
" <h1>Bad Request</h1>\n"
" <p>This server did not understand your request.</p>\n"
" </body>\n"
"</html>\n";

void
die(const char *func, int err)
{
fprintf(stderr,"%s: %s\n",func,strerror(err));
abort();
}

static void handle_get (int connection_fd, const char* page)
{
struct server_module* module = NULL;
if (*page == '/' && strchr (page + 1, '/') == NULL) {
char module_file_name[64];
snprintf (module_file_name, sizeof (module_file_name),
"%s.so", page + 1);
module = module_open (module_file_name);
}

if (module == NULL) {
char response[1024];
snprintf (response, sizeof (response), not_found_response_template, page);
write (connection_fd, response, strlen (response));
}
else {
write (connection_fd, ok_response, strlen (ok_response));
(*module->generate_function) (connection_fd);
module_close (module);
}
}


static void *
handle_connection (int fdSock)
{
int connection_fd = fdSock;
char buffer[256];
ssize_t bytes_read;
bytes_read = read (connection_fd, buffer, sizeof (buffer) - 1);
if (bytes_read > 0) {
char method[sizeof (buffer)];
char url[sizeof (buffer)];
char protocol[sizeof (buffer)];

buffer[bytes_read] = '\0';
sscanf (buffer, "%s %s %s", method, url, protocol);
while (strstr (buffer, "\r\n\r\n") == NULL)
bytes_read = read (connection_fd, buffer, sizeof (buffer));
if (bytes_read == -1) {
close (connection_fd);
return;
}
if (strcmp (protocol, "HTTP/1.0") && strcmp (protocol, "HTTP/1.1")) {
write (connection_fd, bad_request_response,
sizeof (bad_request_response));
}
else if (strcmp (method, "GET")) {
char response[1024];
snprintf (response, sizeof (response),
bad_method_response_template, method);
write (connection_fd, response, strlen (response));
}
else
handle_get (connection_fd, url);
}
else if (bytes_read == 0)
;
else {
system_error ("read");

}
close(connection_fd);
}


void *
serv_request(void *insock)
{
int msock = (int)insock;
struct sockaddr_in fsin;
fd_set rfds;
fd_set afds;
unsigned int alen;
int fd,nfds;
int rval;
socklen_t address_length;
struct sockaddr_in socket_address;

nfds=getdtablesize();

FD_ZERO(&afds);
FD_SET(msock,&afds);

while(1) {
memcpy(&rfds,&afds,sizeof(rfds));
if (select(nfds,&rfds,(fd_set *)0,(fd_set *)0,(struct timeval *)0) < 0)
die("select()",errno);
if (FD_ISSET(msock,&rfds)) {
int ssock;
alen=sizeof(fsin);
/*
Serving new incoming client's connection
*/
pthread_mutex_lock(&get_mutex);
ssock=accept(msock,(struct sockaddr *)&fsin,&alen);
pthread_mutex_unlock(&get_mutex);
if (ssock < 0)
die ("accept()",errno);
if (verbose) {
socklen_t address_length;

address_length = sizeof (socket_address);
rval = getpeername (ssock, &socket_address, &address_length);
assert (rval == 0);
printf ("Thread '%d' accepted connection from %s\n",
pthread_self(),inet_ntoa (socket_address.sin_addr));
}
FD_SET(ssock,&afds);
}
for (fd=0;fd < nfds; ++fd)
if (fd != msock && FD_ISSET(fd,&rfds)) {
printf("Thread '%d' responding request...\n",pthread_self());
/*
Serving client had been already connected to server
*/
handle_connection(fd);
FD_CLR(fd,&afds);
}
}
}


void
server_run(struct in_addr local_address,uint16_t port)
{
struct sockaddr_in socket_address;
int rval;
int server_socket;
int k;
/*
Getting socket's descriptor to be passed to
each thread in the pool
*/
server_socket = socket (PF_INET, SOCK_STREAM, 0);
if (server_socket == -1)
system_error ("socket");
memset (&socket_address, 0, sizeof (socket_address));
socket_address.sin_family = AF_INET;
socket_address.sin_port = port;
socket_address.sin_addr = local_address;
rval = bind (server_socket, &socket_address, sizeof (socket_address));
if (rval != 0)
system_error ("bind");
rval = listen (server_socket, 10);
if (rval != 0)
system_error ("listen");
if (verbose) {
socklen_t address_length;
address_length = sizeof (socket_address);
rval = getsockname (server_socket, &socket_address, &address_length);
assert (rval == 0);
printf ("server listening on %s:%d\n",
inet_ntoa (socket_address.sin_addr),
(int) ntohs (socket_address.sin_port));
}

/*
Starting pool of threads building up HTTP server
*/

size_t stacksize;
pthread_t p_thread[NUM_THREADS];
pthread_attr_t attr;
pthread_attr_init(&attr);
stacksize = 500000;
pthread_attr_setstacksize (&attr, stacksize);
pthread_attr_getstacksize (&attr, &stacksize);

for(k=0; k<NUM_THREADS; k++){
pthread_create(&p_thread[k],&attr,serv_request,(void*)server_socket);
}

pthread_attr_destroy(&attr);

for(k=0;k<NUM_THREADS;k++) {
pthread_join(p_thread[k], NULL);
printf("Completed join with thread %d\n",k);
}
}


Multithreaded RPC Server in White Box Linux 3 environment


This can be considered an example, as shown in reference [1] chapter "Sun RPC".
This is the file square_svc.c for file square.x to build a multithreaded
RPC Server for White Box Linux 3.File square.x (as in reference [1]):


struct square_in {
long arg1;
};
struct square_out {
long res1;
};
program SQUARE_PROG {
version SQUARE_VERS {
square_out SQUAREPROC(square_in) = 1;
} = 2 ;
} = 0x31230000;


Call rpcgen to generate servers, client stubs, header file square.h
and square_xdr.c. Remember key -A is not supported under Linux.
That is why we have an issue (compare with SunOS).


$ rpcgen –a –M square.x


Server's side procedures code:


/*
* ServerSideProc.c
*/
#include "square.h"
#include <stdio.h>
#include <stdlib.h>
#include <rpc/pmap_clnt.h>
#include <string.h>
#include <memory.h>
#include <sys/socket.h>
#include <netinet/in.h>

int request=0;

bool_t

squareproc_2_svc(square_in *inp,square_out *outp,struct svc_req *rqstp)
{
printf("Thread id = '%ld' started, arg = %d\n",pthread_self(),inp->arg1);
sleep(5);
outp->res1=inp->arg1*inp->arg1;
printf("Thread id = '%ld' is done %d \n",pthread_self(),outp->res1);
return(TRUE);
}
int
square_prog_2_freeresult(SVCXPRT *transp,xdrproc_t xdr_result,
caddr_t result)
{
xdr_free(xdr_result,result);
return(1);
}


Modified code square_svc.c:


/* square_svc.c
*
* Please do not edit this file.
* It was generated using rpcgen.
*/
#include "square.h"
#include <stdio.h>
#include <stdlib.h>
#include <rpc/pmap_clnt.h>
#include <string.h>
#include <memory.h>
#include <sys/socket.h>
#include <netinet/in.h>
#ifndef SIG_PF
#define SIG_PF void(*)(int)
#endif

struct thr_data
{
struct svc_req *rqstp;
SVCXPRT *transp;
} ;

pthread_t p_thread;
pthread_attr_t attr;
/* Procedure to be run by thread */

void *
serv_request(void *data)
{
struct thr_data *ptr_data = (struct thr_data *)data;
{
union {
square_in squareproc_2_arg;
} argument;
union {
square_out squareproc_2_res;
} result;
bool_t retval;
xdrproc_t _xdr_argument, _xdr_result;
bool_t (*local)(char *, void *, struct svc_req *);
struct svc_req *rqstp = ptr_data->rqstp;
register SVCXPRT *transp = ptr_data->transp;
switch (rqstp->rq_proc) {
case NULLPROC:
(void) svc_sendreply (transp, (xdrproc_t) xdr_void, (char *)NULL);
return;
case SQUAREPROC:
_xdr_argument = (xdrproc_t) xdr_square_in;
_xdr_result = (xdrproc_t) xdr_square_out;
local = (bool_t (*) (char *, void *, struct svc_req *))squareproc_2_svc;
break;
default:
svcerr_noproc (transp);
return;
}
memset ((char *)&argument, 0, sizeof (argument));
if (!svc_getargs (transp, (xdrproc_t) _xdr_argument, (caddr_t) &argument)) {
svcerr_decode (transp);
return;
}
retval = (bool_t) (*local)((char *)&argument, (void *)&result, rqstp);
if (retval > 0 && !svc_sendreply(transp, (xdrproc_t) _xdr_result, (char *)&result))
{
svcerr_systemerr (transp);
}
if (!svc_freeargs (transp, (xdrproc_t) _xdr_argument, (caddr_t) &argument)) {
fprintf (stderr, "%s", "unable to free arguments");
exit (1);
}
if (!square_prog_2_freeresult (transp, _xdr_result, (caddr_t) &result))
fprintf (stderr, "%s", "unable to free results");
return;
}
}
/*
New code for square_prog_2
*/
static void
square_prog_2(struct svc_req *rqstp, register SVCXPRT *transp)
{
struct data_str
{
struct svc_req *rqstp;
SVCXPRT *transp;
} *data_ptr=(struct data_str*)malloc(sizeof(struct data_str));
{
data_ptr->rqstp = rqstp;
data_ptr->transp = transp;
pthread_attr_setdetachstate(&attr,PTHREAD_CREATE_DETACHED);
pthread_create(&p_thread,&attr,serv_request,(void *)data_ptr);
}
}
int
main (int argc, char **argv)
{
register SVCXPRT *transp;
pmap_unset (SQUARE_PROG, SQUARE_VERS);
transp = svcudp_create(RPC_ANYSOCK);
if (transp == NULL) {
fprintf (stderr, "%s", "cannot create udp service.");
exit(1);
}
if (!svc_register(transp, SQUARE_PROG, SQUARE_VERS, square_prog_2, IPPROTO_UDP)) {
fprintf (stderr, "%s", "unable to register (SQUARE_PROG, SQUARE_VERS, udp).");
exit(1);
}
transp = svctcp_create(RPC_ANYSOCK, 0, 0);
if (transp == NULL) {
fprintf (stderr, "%s", "cannot create tcp service.");
exit(1);
}
if (!svc_register(transp, SQUARE_PROG, SQUARE_VERS, square_prog_2, IPPROTO_TCP)) {
fprintf (stderr, "%s", "unable to register (SQUARE_PROG, SQUARE_VERS, tcp).");
exit(1);
}
svc_run ();
fprintf (stderr, "%s", "svc_run returned");
exit (1);
/* NOTREACHED */
}


Compile ServerSQUARE:


$ gcc –o ServerSQUARE ServerSideProc.c square_svc.c square_xdr.c –lprthread -lnsl


Client's side code:


/*
* ClientSideProc.c
*/

#include "memory.h" /* for memset */
#include "square.h"
#include "stdio.h"
#include "stdlib.h"
#include "rpc/pmap_clnt.h"
#include "string.h"
#include "memory.h"
#include "sys/socket.h"
#include "netinet/in.h"

int
main (int argc,char **argv)
{
CLIENT *cl;
square_in in;
square_out out;
if (argc != 3 )
{ printf ("Usage : client "hostname" "integer_valus=e"\n");
exit(1);
}
cl = clnt_create(argv[1],SQUARE_PROG,SQUARE_VERS,"tcp");
if (cl == NULL) {
clnt_perror (cl, "call failed");
exit (1);
}
in.arg1 = atol(argv[2]);
if (squareproc_2(&in,&out,cl) != RPC_SUCCESS)
{
printf (“%s\n” , clnt_perror (cl,argv[1] ));
exit(1);
}
printf("result: %ld\n",out.res1);
exit(0);
}


Now compile ClientSQUARE:


$ gcc –o ClientSQUARE ClientSideProc.c square_clnt.c square_xdr.c -lprthread -lnsl


Testing (see [1], chapter “SUN RPC”):

[root@dell4500 SQWMT]# cat square.bsh

./ClientSQUARE dell4500.redhat 10 & ./ClientSQUARE dell4500.redhat 11 & ./ClientSQUARE dell4500.redhat 12 & ./ClientSQUARE dell4500.redhat 21 & ./ClientSQUARE dell4500.redhat 13 & ./ClientSQUARE dell4500.redhat 14 & ./ClientSQUARE dell4500.redhat 15 & ./ClientSQUARE dell4500.redhat 16 & ./ClientSQUARE dell4500.redhat 17 & ./ClientSQUARE dell4500.redhat 18 & ./ClientSQUARE dell4500.redhat 19 & ./ClientSQUARE dell4500.redhat 20 &


Output on client's side:


[root@dell4500 SQWMT]# ./square.bsh
[root@dell4500 SQWMT]# result: 196
result: 225
result: 256
result: 289
result: 121
result: 144
result: 441
result: 169
result: 100
result: 324
result: 361
result: 400


Output on Server's side:


[root@dell4501 SQWMT]# ./ServerSQUARE
Thread id = '1082453184' started, arg = 14
Thread id = '1090841664' started, arg = 15
Thread id = '1099230144' started, arg = 16
Thread id = '1116941120' started, arg = 17
Thread id = '1125329600' started, arg = 11
Thread id = '1133718080' started, arg = 12
Thread id = '1142106560' started, arg = 21
Thread id = '1150495040' started, arg = 13
Thread id = '1158883520' started, arg = 10
Thread id = '1167272000' started, arg = 18
Thread id = '1175660480' started, arg = 19
Thread id = '1184048960' started, arg = 20
Thread id = '1082453184' is done 196
Thread id = '1090841664' is done 225
Thread id = '1099230144' is done 256
Thread id = '1116941120' is done 289
Thread id = '1125329600' is done 121
Thread id = '1133718080' is done 144
Thread id = '1142106560' is done 441
Thread id = '1150495040' is done 169
Thread id = '1158883520' is done 100
Thread id = '1167272000' is done 324
Thread id = '1175660480' is done 361
Thread id = '1184048960' is done 400


References:

1. W. Richard Stevens UNIX: Network Programming v 2.Interprocess communications,
Prentice Hall,1999
Adding New Master Sites Without Quiescing the Master Group for Oracle10g 10.2.0.1 in CentOS 4.1 (RHEL AS 4 U1) environment


This technical exercise follows up known bug in 10.1.0.2.

All three databases are ASM in CentOS 4.1 environment

Establishing asynchronous multi-master replication between two sites completed OK.

Attempt to add third follows standard guidelines:-

Step1. Set up:

1.The replication administrator at new master site

2.A scheduled link from each existing master site to new master site

3.A scheduled link from new master site to each existing master site

4.A schedule purge job at new master site

Status OK


Step 2. CONNECT repadmin/repadmin@orcldata (MasterDef Site)


BEGIN
DBMS_REPCAT.SPECIFY_NEW_MASTERS (
gname => 'hr_repg',
master_list => 'qws3data');
END;


Status OK

Next step:-


variable masterdef_flashback_scn number;
variable extension_id varchar2(50);
BEGIN
DBMS_REPCAT.ADD_NEW_MASTERS (
export_required => true,
available_master_list => 'qws3data',
masterdef_flashback_scn => :masterdef_flashback_scn,
extension_id => : extension_id,
break_trans_to_masterdef => false,
break_trans_to_new_masters => false,
percentage_for_catchup_mdef => 80,
cycle_seconds_mdef => 60,
percentage_for_catchup_new => 80,
cycle_seconds_new => 60);
END;


PL/SQL procedure completed OK


select count(*) from DBA_REPCATLOG;

gives "0"


Create a directory object at each database.


CONNECT SYSTEM/drbrxa@qws3data;
CREATE DIRECTORY DPUMP_DIR AS '/usr/dpump_dir';
CONNECT SYSTEM/drbrxa@orcldata;
CREATE DIRECTORY DPUMP_DIR AS '/usr/dpump_dir';


Perform object-level export of tables at master definition database.


SELECT FLASHBACK_SCN FROM DBA_REPEXTENSIONS;


497533

$export ORACLE_SID=orcldata
$expdp system/drbrxa TABLES=SCOTT.DEPT,SCOTT.EMP,DIRECTORY=DPUMP_DIR
DUMPFILE=scott_tables.dmp CONTENT=data_only FLASHBACK_SCN=497533


Resume propagation at the master definition site.


CONNECT repadmin/repadmin@orcldata; (MasterDef Site)
BEGIN
DBMS_REPCAT.RESUME_PROPAGATION_TO_MDEF (
extension_id => :extension_id);
END;


Transfer the export dump files to the new master site.

Perform object-level import at new master site.


$export ORACLE_SID=qws3data
$impdp system/drbrxa TABLES=SCOTT.DEPT,SCOTT.EMP, DIRECTORY=DPUMP_DIR
DUMPFILE=scott_tables.dmp CONTENT=data_only TABLE_EXISTS_ACTION=append


Allow new masters to receive deferred transactions.


CONNECT repadmin/repadmin@qws3data; (Newly added site)
BEGIN
DBMS_REPCAT.PREPARE_INSTANTIATED_MASTER (
extension_id => :extension_id);
END;


Notice:-

Serial propagation won't work for new site. Parallel might be utilized

Sunday, October 30, 2005


Installing Oracle 10g R2, Apache (2.0.54) and PHP (5.0.4) on CentOS 4.1 (RHEL 4 U1)


This article has been compiled from different pieces located in different places at OTN. My effort was only to bring
all stuff together, test it works and make easy to understand the core technology based on Instant-Client installation on the CentOS 4.1 Linux box already running Oracle10g R2 database server.Note,that if database TNSLISTENER port is different from 1521,port number should be specified in the connect string for sqlplus.


Instant Client allows you to run your applications without installing the standard Oracle client or having an ORACLE_HOME. OCI, OCCI, Pro*C, ODBC, and JDBC applications work without modification, while using significantly less disk space than before. Even SQL*Plus can be used with Instant Client. No recompile, no hassle.Customers can try new packaged applications and Oracle client features quickly without worrying about other installations. Larger enterprises can automate setup and configuration of Instant Client by using installation scripts accessing a central IT repository. Finally, everyone can benefit from the smaller footprint
Download from:-


http://www.oracle.com/technology/software/tech/oci/instantclient/htdocs/linuxsoft.html


Instant Client Package - Basic: All files required to run OCI, OCCI,
and JDBC-OCI Applications


oracle-instantclient-basic-10.2.0.1-1.i386.rpm
instantclient-basic-linux32-10.2.0.1-20050713.zip


Instant Client Package - SQL*Plus: Additional libraries and executable
for running SQL*Plus with Instant Client


oracle-instantclient-sqlplus-10.2.0.1-1.i386.rpm
instantclient-sqlplus-linux32-10.2.0.1-20050713.zip


Instant Client Package - SDK: Additional header files and an example makefile
for developing Oracle applications with Instant Client


oracle-instantclient-devel-10.2.0.1-1.i386.rpm
instantclient-sdk-linux32-10.2.0.1-20050713.zip


Install PHP, Apache and Oracle Instant Client
Installing and testing Instant Client
Run as root:-


# rpm -Uvh oracle-instantclient-basic-10.2.0.1-1.i386.rpm
# rpm -Uvh oracle-instantclient-sqlplus-10.2.0.1-1.i386.rpm
# rpm -Uvh oracle-instantclient-devel-10.2.0.1-1.i386.rpm
# useradd -g oinstall -G dba orauser
# passwd orauser


Login as orauser.Test connection to the database:


$ export LD_LIBRARY_PATH= /usr/lib/oracle/10.2.0.1/client/lib
$ /usr/lib/oracle/10.2.0.1/client/bin/sqlplus scott/drbrxa@//ServerORCL.informatics.dstu.net/rawdbase
SQL> exit


Installing and testing Apache
Login as your "orauser" user
Build Apache:


$ bzcat httpd-2.0.54.tar.bz2 tar xf -
$ cd httpd-2.0.54
$ ./configure --prefix=$HOME/apache --enable-so --with-mpm=prefork
$ make
$ make install


Edit $HOME/apache/conf/httpd.conf and change the port to 8888:
Listen hostname:8888
Start Apache:


$HOME/apache/bin/apachectl start


Start a browser and check that http://hostname:8888/ gives the
default Apache web page.
Stop Apache:


$HOME/apache/bin/apachectl stop


Installing and testing PHP
Build PHP:


$ bzcat php-5.0.4.tar.bz2 tar xf -
$ cd php-5.0.4
$ ./configure --prefix=$HOME/php --with-apxs2=$HOME/apache/bin/apxs --with-config-file-path=$HOME/apache/conf --with-oci8-instant-client= /usr/lib/oracle/10.2.0.1/client/lib --enable-sigchild

$ make
$ make install
$ cp php.ini-recommended $HOME/apache/conf/php.ini


Edit php.ini and change display_errors to On:

display_errors = On

Add these lines to the $HOME/apache/conf/httpd.conf file:

AddType application/x-httpd-php .php
AddType application/x-httpd-php-source .phps

Restart Apache:


$HOME/apache/bin/apachectl start


LD_LIBRARY_PATH should contains /usr/lib/oracle/10.2.0.1/client/lib before
starting Apache
Test it all works
TEST 1:
Create a file $HOME/apache/htdocs/phpinfo.php containing:


<?php
phpinfo();
?>


Load this file in a browser:

http://hostname:8888/phpinfo.php

Check the value of LD_LIBRARY_PATH in the Environment section.
it should contain the Instant Client directory.
Check that there is a section "oci8" with OCI8 Support marked as
"enabled".

TEST 2:

Create a file $HOME/apache/htdocs/test.php containing:


<?php

$conn = OCILogon("scott", "tiger", "//hostname:tns_listener_portnumber/orclraw");

if (!$conn) {
exit;
}

echo OCIServerVersion($conn) ."<br>\n";
print date('Y-m-d H:i:s')."<br><br>\n";

$query = 'SELECT * FROM EMP';

$stid = OCIParse($conn, $query);
OCIExecute($stid, OCI_DEFAULT);

print '<table border="1">';
while ($succ = OCIFetchInto($stid, $row, OCI_RETURN_NULLS)) {
print '<tr>';
foreach ($row as $item) {
print '<td>'.($item?htmlentities($item):' ').'</td>';
}
print '</tr>';
}
print '</table>';

OCILogoff($conn);
?>


Load this file in a browser:
http://hostname:8888/test.php

Friday, September 23, 2005

Oracle's 10g ASM implementation on CentOS 4.1 (RHEL 4 U1)


Actually there are several nice articles on Oracle Technical Network
devoted to the same topic. What’s new may be said ?
The target of publication is to highlight the optimal sequence of steps
required to bring Oracle10g (10.2.0.1) ASM-database up on CentOS4.1,
placing ASM instance and serviced databases in different Oracle Homes.
Oracleasm library install is done immediately after creating "oracle"
linux account and "dba" group to be ready for ASM Instance creating during
the first Installer run supposed to build it. ASM instance for disks and disk’s
group management is created the first by Installer along with the disk’s group
for database supposed to be built during the second run of Installer and to be
placed into recently created disk’s group.

I. Oracle 10gR2 ASM and ASMLib 2.0 I/O.

1.Install CentOS 4.1

2.Run as root:


# groupadd dba # group of users to be granted SYSDBA system privilege
# groupadd oinstall # group owner of Oracle files
# useradd -c "Oracle software owner" -g oinstall -G dba oracle
# passwd oracle
# mkdir -p /u01/app/oracle
# chown -R oracle.oinstall /u01
# mkdir -p /u02/oradata/wtfdata
# chown -R oracle.oinstall /u02


OTN instruction:-
Before installing Automatic Storage Management, it is recommended that you install
the optional add-on Automatic Storage Management support library, ASMLib.
ASMLib is an application program interface (API) Oracle that is aimed at simplifying
the interface between the operating system and the database, and to exploit
the capabilities and strengths of storage arrays provided by different vendors.
ASMLib provides an alternative interface for the Automatic Storage Management-enabled kernel to discover and access block devices. It provides storage and operating system vendors the opportunity to supply extended storage-related features.
These features provide benefits such as improved performance and greater data integrity.
OTN instruction ends.


3.To install ASMLIB 2.0 run as root:-


# rpm -Uvh oracleasm-2.6.9-11.ELsmp-2.0.0-1.i686.rpm oracleasmlib-2.0.0-1.i386.rpm oracleasm-support-2.0.0-1.i386.rpm


Now you get /etc/init.d/oracleasm ready to go.

Configuring the Oracle ASM library driver:-


# /etc/init.d/oracleasm configure
Default user to own the driver interface [oracle]: oracle
Default group to own the driver interface [dba]: dba
Start Oracle ASM library driver on boot (y/n) [y]: y
Fix permissions of Oracle ASM disks on boot (y/n) [y]: y
Writing Oracle ASM library driver configuration: [ OK ]
Scanning system for ASM disks: [ OK ]


# /etc/init.d/oracleasm enable


Create ASM disks as desired utilizing command:


# /etc/init.d/oracleasm createdisk VLM0X /dev/sdx


Tune /etc/sysctl.conf,/etc/security/limits.conf,/etc/pam.d/login, /etc/profile
and oracle's shell environment as advised in [1].

Login as oracle:-


$ cd /tmp/database
$./runInstaller


OTN instructions:-
It’s recommended that you install Automatic Storage Management in its own Oracle home, regardless of whether you plan to only have one or multiple database instances.
Installing Automatic Storage Management in its own Oracle home helps ensure higher
availability and manageability.With separate Oracle homes, you can upgrade Automatic Storage Management and databases independently, and you can remove database software without impacting the Automatic Storage Management instance. Ensure that the Automatic Storage Management version is the same or later than the Oracle Database version.If an Automatic Storage Management installation does not already exist and you select the Oracle Universal Installer option to install and configure Automatic Storage Management only, then Oracle Universal Installer installs Automatic Storage Management in its own Oracle home.
OTN instruction ends.


Select " Advanced installation" and create ASM instance in
$ORACLE_HOME=/u01/app/oracle/oracle/product/10.2.0/db_1

Create disk group during this run .

Exit installer.


$ ./runInstaller


Select " Advanced installation" and create new ASM-database placed into existing disk's group

in $ORACLE_HOME=/u01/app/oracle/oracle/product/10.2.0/db_2 .
Modify ~oracle/.bash_profile correspondently. Relogin as oracle.

Next:-


$ sqlplus /nolog
SQL> conn / as sysdba
Connected.
SQL> shutdown immediate;
Database closed.
Database dismounted.
ORACLE instance shut down.
SQL> startup mount;
ORACLE instance started.

Total System Global Area 285212672 bytes
Fixed Size 1218968 bytes
Variable Size 88082024 bytes
Database Buffers 188743680 bytes
Redo Buffers 7168000 bytes
Database mounted.

SQL> alter database archivelog;
Database altered.
SQL> alter database MastDB flashback on;
Database altered.
SQL> alter database open;
Database altered.


Open Enterpise Manager console.(Enterprise Manager 10g Database Control URL

http://ServerCentOS41:1158/em). Create new disk's group for flashback

recovery area and modify corresponding value on Recovery Settings page of EM.

System startup in this case should look like:-


[oracle@ServerCentOS41 ~]$ ./lsnrstart
LSNRCTL for Linux: Version 10.2.0.1.0 - Production on 30-AUG-2005 17:57:41
Copyright (c) 1991, 2005, Oracle. All rights reserved.
Starting /u01/app/oracle/product/10.2.0/db_1/bin/tnslsnr: please wait...
TNSLSNR for Linux: Version 10.2.0.1.0 - Production
System parameter file is /u01/app/oracle/product/10.2.0/db_1/network/admin/listener.ora
Log messages written to /u01/app/oracle/product/10.2.0/db_1/network/log/listener.log
Listening on: (DESCRIPTION=(ADDRESS=(PROTOCOL=tcp)(HOST=ServerCentOS41)(PORT=1521)))
Listening on: (DESCRIPTION=(ADDRESS=(PROTOCOL=ipc)(KEY=EXTPROC1)))
Connecting to (DESCRIPTION=(ADDRESS=(PROTOCOL=TCP)(HOST=ServerCentOS41)(PORT=1521)))
------------------------
STATUS of the LISTENER
------------------------
Alias LISTENER
Version TNSLSNR for Linux: Version 10.2.0.1.0 - Production
Start Date 30-AUG-2005 17:57:42
Uptime 0 days 0 hr. 0 min. 0 sec
Trace Level off
Security ON: Local OS Authentication
SNMP OFF
Listener Parameter File /u01/app/oracle/product/10.2.0/db_1/network/admin/listener.ora
Listener Log File /u01/app/oracle/product/10.2.0/db_1/network/log/listener.log
Listening Endpoints Summary...
(DESCRIPTION=(ADDRESS=(PROTOCOL=tcp)(HOST=ServerCentOS41)(PORT=1521)))
(DESCRIPTION=(ADDRESS=(PROTOCOL=ipc)(KEY=EXTPROC1)))
Services Summary...
Service "PLSExtProc" has 1 instance(s).
Instance "PLSExtProc", status UNKNOWN, has 1 handler(s) for this service...
The command completed successfully

LSNRCTL for Linux: Version 10.2.0.1.0 - Production on 30-AUG-2005 17:57:42
Copyright (c) 1991, 2005, Oracle. All rights reserved.
Starting /u01/app/oracle/product/10.2.0/db_2/bin/tnslsnr: please wait...
TNSLSNR for Linux: Version 10.2.0.1.0 - Production
System parameter file is /u01/app/oracle/product/10.2.0/db_2/network/admin/listener.ora
Log messages written to /u01/app/oracle/product/10.2.0/db_2/network/log/listener.log
Listening on: (DESCRIPTION=(ADDRESS=(PROTOCOL=tcp)(HOST=ServerCentOS41)(PORT=1522)))
Listening on: (DESCRIPTION=(ADDRESS=(PROTOCOL=ipc)(KEY=EXTPROC2)))
Connecting to (DESCRIPTION=(ADDRESS=(PROTOCOL=TCP)(HOST=ServerCentOS41)(PORT=1522)))
------------------------
STATUS of the LISTENER
------------------------
Alias LISTENER
Version TNSLSNR for Linux: Version 10.2.0.1.0 - Production
Start Date 30-AUG-2005 17:57:42
Uptime 0 days 0 hr. 0 min. 0 sec
Trace Level off
Security ON: Local OS Authentication
SNMP OFF
Listener Parameter File /u01/app/oracle/product/10.2.0/db_2/network/admin/listener.ora
Listener Log File /u01/app/oracle/product/10.2.0/db_2/network/log/listener.log
Listening Endpoints Summary...
(DESCRIPTION=(ADDRESS=(PROTOCOL=tcp)(HOST=ServerCentOS41)(PORT=1522)))
(DESCRIPTION=(ADDRESS=(PROTOCOL=ipc)(KEY=EXTPROC2)))
Services Summary...
Service "PLSExtProc" has 1 instance(s).
Instance "PLSExtProc", status UNKNOWN, has 1 handler(s) for this service...
The command completed successfully


[oracle@ServerCentOS41 ~]$ dbstart

Processing ASM instance "+ASM": log file /u01/app/oracle/product/10.2.0/db_1/startup.log
Processing Database instance "MastDB": log file /u01/app/oracle/product/10.2.0/db_2/startup.log
[oracle@ServerCentOS41 ~]$ emctl start dbconsole


TZ set to US/Eastern
Oracle Enterprise Manager 10g Database Control Release 10.2.0.1.0
Copyright (c) 1996, 2005 Oracle Corporation. All rights reserved.
http://ServerCentOS41:1158/em/console/aboutApplication
Starting Oracle Enterprise Manager 10g Database Control .............. started.
-------------------------------------------------------------------------------
Logs are generated in directory /u01/app/oracle/oracle/product/10.2.0/db_2/ServerCentOS41_MastDB/sysman/log


Install described above was done with different Oracle Homes

for ASM instance and ASM-database.

To put ASM instance and ASM-database in same Oracle Home.

Start runInstaller just once to build all stuff at a time.

Login as oracle:-


$ cd /tmp/database
$./runInstaller


Select " Advanced option" and install "Software only"

in ORACLE_HOME - /u01/app/oracle/oracle/product/10.2.0/db_1.
Modify oracle's .bash_profile:-
export ORACLE_HOME and new PATH.
Source new .bash_profile:-


$. ~oracle/.bash_profile
$dbca


During this run the request to start CSS daemons by root will come up.


# $ORACLE_HOME/bin/localconfig add


ASM instance , needed disk's groups and ASM-database itself will be created.
Then perform listener and local TNS names configuration.


$netca


II. Oracle 10gR2 ASM and Standard Linux I/O.


This method creates Oracle database files on raw character devices managed by ASM
using standard Linux I/O system calls.It requires to create RAW devices for all
disk partitions used by ASM.


1.Install CentOS 4.1

2.Run as root:


# groupadd dba # group of users to be granted SYSDBA system privilege
# groupadd oinstall # group owner of Oracle files
# useradd -c "Oracle software owner" -g oinstall -G dba oracle
# passwd oracle
# mkdir -p /u01/app/oracle
# chown -R oracle.oinstall /u01
# mkdir -p /u02/oradata/data
# chown -R oracle.oinstall /u02


Just as an example create 4 partitions:

/dev/hda6,/dev/hdc6 5 GB each one

/dev/hda7,/dev/hdc7 3 GB each one

Create raw devices modifying file /etc/sysconfig/rawdevices as follows:

/dev/raw/raw1 /dev/hda6

/dev/raw/raw2 /dev/hdc6

/dev/raw/raw3 /dev/hda7

/dev/raw/raw4 /dev/hdc7

Put in /etc/rc.d/rc.local

chown oracle:dba /dev/raw/raw*

chmod 660 /dev/raw/raw*

I was experiencing problems with loosing "oracle:dba" permissions after Linux
reboot. Oracle's raw device came up with "root:disk" ownership after reboot.


Restart Linux

Run as root:-


# service rawdevices restart


Tune /etc/sysctl.conf,/etc/security/limits.conf,/etc/pam.d/login,

/etc/profile and oracle's shell environment as advised in [1].


Login as oracle:-


$ cd /tmp/database
$./runInstaller


Select " Advanced installation" and
create ASM instance in ORACLE_HOME=/u01/app/oracle/oracle/product/10.2.0/asm
During this run create diskgroup RAWDATA1 with normal redundancy
mirroring /dev/raw/raw1 and /dev/raw/raw2.You should be fine with discovering raw devices unless permissions "oracle:dba" are lost
Exit installer.

Export ORACLE_HOME for ASM instance and corresponding PATH.
Then run "dbca" to create diskgroup RAWDATA2 with
normal redundancy mirroring /dev/raw/raw3 and /dev/raw/raw4

  
$ ./runInstaller


Select " Advanced installation" and create new ASM-database placed RAWDATA1 diskgroup

in $ORACLE_HOME=/u01/app/oracle/oracle/product/10.2.0/db_1.
Modify ~oracle/.bash_profile correspondently.Relogin as oracle.
Next:-


$ sqlplus /nolog
SQL> conn / as sysdba
Connected.
SQL> shutdown immediate;
Database closed.
Database dismounted.
ORACLE instance shut down.
SQL> startup mount;
ORACLE instance started.
Total System Global Area 285212672 bytes
Fixed Size 1218968 bytes
Variable Size 88082024 bytes
Database Buffers 188743680 bytes
Redo Buffers 7168000 bytes
Database mounted.
SQL> alter database archivelog;
Database altered.
SQL> alter database rawdbs flashback on;
Database altered.
SQL> alter database open;
Database altered.


Open Enterpise Manager console.(Enterprise Manager 10g Database Control

URL http://ServerCentOS41:1158/em). Put flashback recovery area in RAWDATA2

modifying corresponding value on Recovery Settings page of EM.


References.

1.www.puschitz.com/InstallingOracle10g.shtml