Sunday, January 27, 2008


Install Solaris (SNV78) DomU at Ubuntu 7.10 Dom0 (x86_64)


Recent posting ([2]) by Jürgen Keil at OpenSolaris xen-discuss forum
briefly states, that mentioned install runs without problems if disk entry of installation profile is referencing ISO image of SNV75A DVD. However, install Xen from Internet Repositories on Ubuntu 7.10 (x86_64) appears to be not quite trivial and was described by Bob Mertz ih his blog ([3]).
Target of this posting is to give step by step instruction
for Xen 3.1 SNV78 DomU install at Ubuntu 7.10 Dom0 (x86_64)
utilizing "pygrub" as advised in OpenSolaris manual [1].
Actually , it brings all stuff together and makes procedure
reproducable for any person regardless of his IT experience.
I also have to mention , that both NICs assembled on ASUS P5K Premium/WIFI-AP
were detected by Ubuntu 7.10 without any problems.


Xen 3.1 has been installed from 6 CDs set Ubuntu Packages 7.10upd2.
Each one of CDs was added to system by command:-
# apt-cdrom add
Next step :-
# aptitude install linux-image-xen bridge-utils libxen3.1 \
python-xen-3.1 xen-docs-3.1 \
xen-hypervisor-3.1 xen-ioemu-3.1 \
xen-tools xen-utils-3.1
Tune /etc/xen/xend-conf.sxp file to assign xenbr0 to desired ethernet interface
and reboot into into xen-kernel.
Corresponding entry into /boot/grub/menu.lst would be created automatically.


Installation profile for SNV DomU [1] :-


name = 'Solaris78PVM'
memory = '1024'
disk = [ 'file:/usr/lib/xen-solaris/snv78.iso,6:cdrom,r', 'phy:/dev/sda6,0,w' ]
vif = [ '' ]
bootloader = '/use/bin/pygrub'
kernel = '/boot/platform/i86xpv/kernel/amd64/unix'
ramdisk = '/boot/amd64/x86.miniroot'
extra = '/platform/i86xpv/kernel/amd64/unix - nowin -B install_media=cdrom'


Now run:-
# xm create -c Solaris78PVM.install


Runtime profile for SNV DomU [1] :-


name = 'Solaris78PVM'
memory = '1024'
disk = [ 'phy:/dev/sda6,0,w' ]
vif = [ '' ]


Now run:-
# xm create -c Solaris78PVM.runtime


References
1.http://www.opensolaris.org/os/community/xen/docs/linux-dom0/
2.http://www.opensolaris.org/jive/thread.jspa?threadID=44733
3http://notepad.bobkmertz.com/2007/11/installing-xen-on-ubuntu-710-amd64.html

Wednesday, January 23, 2008


Setting up VNC for F7 DomU at Solaris (SNV78) Dom0


OpenSolaris discussions often reference F7 as Linux DomU at SNV Dom0.
F7 is Xen 3.0.4 enabled distro, what looks as the most suitable for
OpenSolaris Dom0 (build <=78).
At mean time installation for Linux DomUs (F7,F8,CentOS 5.0) is possible only in
text mode. File ~/.vnc/xstartup will be created automatically by running vncserver.


Create Fedora7 DomU at SNV78 Dom0 :-


# lofiadm -a /export/home/isos/f7.iso
# mount -o ro -F hsfs /dev/lofi/1 /mnt
# share -F nfs /mnt
# virt-install -n FDR7PVM -p -r 1024 --nographics -x "console=hvc0" \
-f /second_root/images/f7pvm.img -l nfs:<IP-ADDRESS Dom0>:/mnt


As was noticed by Mark Jonson file ~/.vnc/xstartup may be created
on F7 DomU automatically.
Login as root and run:-


# mkdir .vnc
# cd .vnc
# vncserver :1


Vnc password will be requested by the last command.
Edit ~/.vnc/xstartup and uncomment first two lines.
Make this file as follows bellow:


#!/bin/sh
unset SESSION_MANAGER
exec /etc/X11/xinit/xinitrc

[ -x /etc/vnc/xstartup ] && exec /etc/vnc/xstartup
[ -r $HOME/.Xresources ] && xrdb $HOME/.Xresources
xsetroot -solid grey
vncconfig -iconic &
xterm -geometry 80x24+10+10 -ls -title "$VNCDESKTOP Desktop" &
twm &


Copy xstartup file to /etc/vnc directory.
Make following changes to /etc/sysconfig/vncservers file:-


VNCSERVERS="1:root"
VNCSERVERARGS[1]="-geometry 1024x768"


Then run:-


# chkconfig vncserver on
# reboot


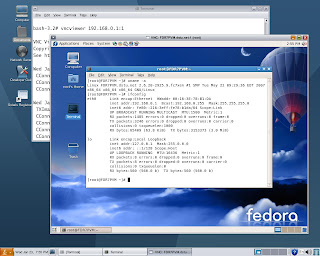
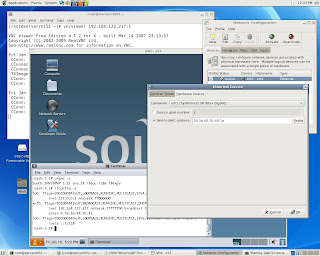
Snapshots:-


References.
http://mail.opensolaris.org/pipermail/xen-discuss/2007-July/000979.html

Thursday, January 17, 2008


Install CentOS 5.1 (x86_64) with Virtualization on ASUS P5K Premium/WIFI


ASUS P5K Premium/WIFI-AP and ASUS P5E3 Deluxe have following two NICs:-
Marvell 88E8056 10/100/1000 Мbit/sec + Realtek RTL8110SC 10/100/1000 Mbit/sec integrated on the boards.
Original installation has been run with RTL 8139 NIC plugged into PCI slot.
As was expected, neither one of NICs integrated on ASUS P5K Premium/WIFI has been detected by CentOS 5.1(x86_64) during install.

To resolve the problem, I've successfully compiled the most recent SKGE Driver "install10.50.1.3.tar.bz2" with Xen-kernel. Ran "modprobe sky98lin". Rebooted CentOS 5.1 box. It came up with new ethernet interface eth2 assigned to Marvell Yukon 88E8056 Gig Ethernet . I've configured static IP for eth2.

Modified xend-conf.sxp to reassign xenbr0 to eth2 , restarted xend and libvirtd services.

Disabled eth0 configured for RTL 8139. Rebooted Linux box and performed
virt-install of Windows XP HVM to test Xen functonality.
IE is running on Windows XP HVM connected to Proxy Server on remote host.


Second CentOS 5.1 Dom0 instance on the same box has been built without any additional
NICs and originally came up without any Ethernet interface.
SKGE driver install created eth1 interface assigned to Marvell Yukon 88E8056.
File /etc/xen/xend-conf.sxp has been edited to assign xenbr0 to network device eth1
and xend service restarted.Built in bridge beetwen Dom0 and Dnsmasq served subnet
appears to be working fine. SNV78 DomU has been created at CentOS 5.1 Dom0.


Friday, January 11, 2008


Internet working on SNV78 DomU at CentOS 5.1 Dom0


Tuning Firefox to work through remote Proxy Server.


Surfing internet with Proxy installed on another box at same LAN as Dom0


Wednesday, January 02, 2008


Install OpenSolaris (SNV78) DomU at CentOS 5.1 Dom0 (x86_64)


Xen implementation on CentOS 5.1 through my experience appears to be self-sufficient,
having service dnsmasq as embedded DHCP server at CentOS 5.1 Dom0 for Linux and Solaris DomUs.
Moreover by running :-


# chkconfig libvirtd off
# reboot


it's easy to disable virbr0 interface and revert
back to old fashion xen-bridging with static IP addresses
Bug [1] is still affecting CentOS 5.1.
Follow guidelines from [2] on CentOS 5.1 to fix it.


# cd /usr/lib64/python2.4/site-packages/xen/xend/server
# vi blkif.py and made this change:

devid = blkif.blkdev_name_to_number(dev)
-if not devid:
+if devid is None:
raise VmError('Unable to find number for device (%s)' % (dev))finally:
# /etc/init.d/xend restart


Create installation SNV78 DomU profile, view [4] for example.


# cat SolarisNVB78.conf


name = "SolarisNVB78"
vcpus = 1
memory = "1024"
kernel = "/usr/lib/xen-solaris/unix-78"
ramdisk = "/usr/lib/xen-solaris/x86.miniroot-78"
extra = "/platform/i86xpv/kernel/amd64/unix - nowin -B install_media=cdrom"
disk = ['file:/usr/lib/xen-solaris/snv78.iso,6:cdrom,r','phy:/dev/sdb10,0,w']
vif = ['']
on_shutdown = "destroy"
on_reboot = "destroy"
on_crash = "destroy"


# xm create -c SolarisNVB78.conf


Select DHCP for DomU virtual interface xnf0 and proceed
with installation.
NOTICES reported during initial install as well as during subsequent
bootings up won't affect SNV78 DomU functionality.
Solaris DomU partitioning and slicing will be performed properly.


Complete first installation phase, modify profile
for runtime and start SNV78 DomU.


# cat SolarisNVB78.conf


name = "SolarisNVB78"
memory = 1024
disk = ['phy:/dev/sdb10,0,w']
kernel = "/usr/lib/xen-solaris/unix-78"
ramdisk = "/usr/lib/xen-solaris/x86.miniroot-78"
extra = "/platform/i86xpv/kernel/amd64/unix"
vif = [' ']
root = "/dev/dsk/c0d0s0"
on_reboot = "destroy"
on_shutdown = "destroy"
on_crash = "destroy"


# xm create -c SolarisNVB78.conf


Add "set xnf:xnf_cksum_offload = 0" to /etc/system (build < 81)
and run as root :-


# bootadm update-archive
# /usr/bin/scp -S /usr/bin/ssh \
/platform/i86pc/amd64/boot_archive \
Dom0-IP-ADDRESS:/usr/lib/xen-solaris
# shutdown -y -i0 -g0


Make final changes to SNV78 PVM profile
by pointing ramdisk to boot_archive:-


ramdisk = "/usr/lib/xen-solaris/boot_archive"


Start SNV78 DomU and configure Sun Xvnc using following set
of instructions (view [3] for example).


Add a display1 instance of x11-server service for configuration
and configure it to run Xvnc


# svccfg -s application/x11/x11-server add display1
# svccfg -s application/x11/x11-server:display1 addpg options application
# svccfg -s application/x11/x11-server:display1 addpropvalue options/server astring: "/usr/X11/bin/Xvnc"
# svccfg -s application/x11/x11-server:display1 addpropvalue options/server_args astring: '"SecurityTypes=None"'
# mkdir -p /etc/dt/config
# cp /usr/dt/config/Xservers /etc/dt/config/Xservers
# echo " :1 Local local_uid@none root /usr/X11/bin/Xserver :1" >> /etc/dt/config/Xservers
# pkill -HUP dtlogin


SSH connection from SNV78 DomU to Dom0 and running at CentOS 5.1 :-
# xm list -l SolarisNVB78
report


******************************************************************************************
Install OpenSolaris (SNV78) DomU at CentOS 5.1 Dom0(kernel-xen-2.6.18-53.1.4.el5)
******************************************************************************************


Installed kernel:-


# rpm -ivh kernel-xen-2.6.18-53.1.4.el5.x86_64.rpm \
kernel-xen-devel-2.6.18-53.1.4.el5.x86_64.rpm


Created new entry into grub.conf , rebooted into new xen-kernel
and reproduced installation above with no problems.


title CentOS (2.6.18-53.1.4.el5xen)
root (hd0,4)
kernel /xen.gz-2.6.18-53.1.4.el5
module /vmlinuz-2.6.18-53.1.4.el5xen ro root=/dev/VolGroup02/LogVol01 rhgb quiet
module /initrd-2.6.18-53.1.4.el5xen.img


Installation snapshots:-


Startup snapshots:-


Runtime snapshots:-


SNV78 DomU network inteface xnf0 configuration :-


SNV DomU restarted wih another IP address obtained from dnsmask service:-


Accessing SNV78 DomU from remote Windows XP desktop with Cygwin/X :-


Internet working at SNV78 DomU utilizing remote Proxy Server


References
1.https://bugzilla.redhat.com/show_bug.cgi?id=253222
2.http://xenbits.xensource.com/xen-unstable.hg?rev/70687bcb82dd
3.http://librenix.com/?inode=11382
4.http://librenix.com/?inode=11144