Install Oracle 10.2.0.1 (64-bit) on SNV93 DomU at SNV93 Dom0
This instruction closely follows the one for 32-bit install
Oracle 10.2.0.2 on Solaris 10 at oracle-base.com ([1]). I have to
notice that attempt to reproduce it on 32-bit SNV93 DomU crashes
as usual. View discuss forum@opensolaris.org ([2]).
However, it's a bit different from [1] and allows to perform everything
quite smoothly. It is also supposed to be used only in development environment.
As the root user, issue the following command.
# projadd oracle
Append the following line to the "/etc/user_attr" file.
oracle::::project=oracle
If you've performed a default installation, it is likely that the only kernel parameter you need to alter is "max-shm-memory".
To check the current value issue the following command.
# prctl -n project.max-shm-memory -i project oracle
    project: 100: oracle
NAME    PRIVILEGE       VALUE    FLAG   ACTION  RECIPIENT
project.max-shm-memory
        privileged       254MB      -   deny        -
        system          16.0EB    max   deny        -
To reset this value, make sure at least one session is logged in as the oracle user, then from the root user issue the following commands.
# prctl -n project.max-shm-memory -v 4gb -r -i project oracle
# projmod -s -K "project.max-shm-memory=(priv,4gb,deny)" oracle
The first dynamically resets the value, while the second makes changes to the "/etc/project" file so the value is persistent between reboots.
# cat /etc/project
    system:0::::
    user.root:1::::
    noproject:2::::
    default:3::::
    group.staff:10::::
    oracle:100::::project.max-shm-memory=(priv,4294967296,deny)


#  prctl -n project.max-shm-memory -i project oracle
project: 100: oracle
NAME    PRIVILEGE       VALUE    FLAG   ACTION RECIPIENT
project.max-shm-memory
        privileged      4.00GB      -   deny     -
        system          16.0EB    max   deny     -
Create the new groups and users:
    groupadd oinstall
    groupadd dba
    groupadd oper
    useradd -g oinstall -G dba -d -m /export/home/oracle \
    -s /bin/bash oracle
    chown oracle:oinstall /export/home/oracle
    passwd -r files oracle
Create the directories in which the Oracle software will be installed:
# mkdir -p /u01/app/oracle/product/10.2.0/db_1
# chown -R oracle:oinstall /u01
Login as the oracle user and add the following lines at the end of the .bash_profile file:
    # Oracle Settings
    TMP=/tmp; export TMP
    TMPDIR=$TMP; export TMPDIR
    # Select the appropriate ORACLE_BASE
    #ORACLE_BASE=/export/home/oracle; export ORACLE_BASE
    ORACLE_BASE=/u01/app/oracle; export ORACLE_BASE
    ORACLE_HOME=$ORACLE_BASE/product/10.2.0/db_1; export ORACLE_HOME
    ORACLE_SID=SNV93; export ORACLE_SID
    PATH=$ORACLE_HOME/bin:$PATH; export PATH
    TERM=vt100; export TERM
Set up Sun Xvnc at DomU and login as oracle via
# vncviewer IP-DomU:1
from another terminal session.
svccfg -s application/x11/x11-server \
add display1
svccfg -s application/x11/x11-server:display1 \
addpg options application
svccfg -s application/x11/x11-server:display1 \
addpropvalue options/server astring: "/usr/X11/bin/Xvnc"
svccfg -s application/x11/x11-server:display1 \
addpropvalue options/server_args astring: '"SecurityTypes=None"'

# Configure dtlogin to start it

mkdir -p /etc/dt/config
cp /usr/dt/config/Xservers /etc/dt/config/Xservers
echo " :1 Local local_uid@none root /usr/X11/bin/Xserver :1" \
>> /etc/dt/config/Xservers
pkill -HUP dtlogin
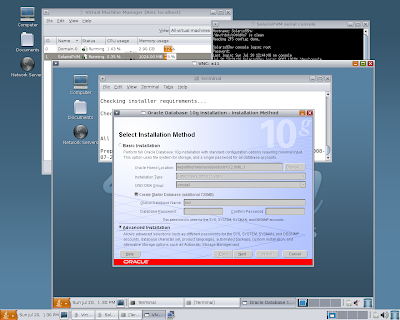
Start ./runIstaller in advanced mode and
select option "Install Software only"
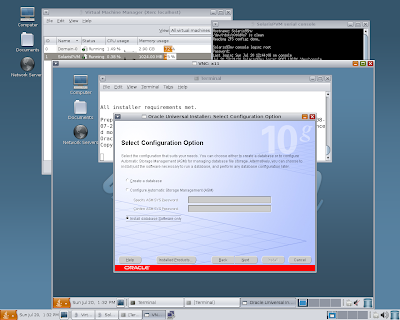
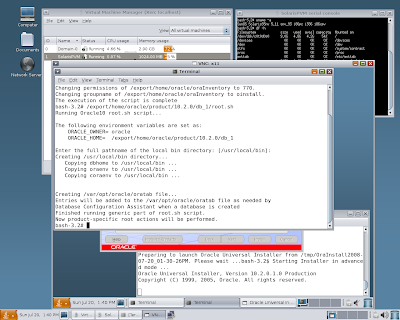
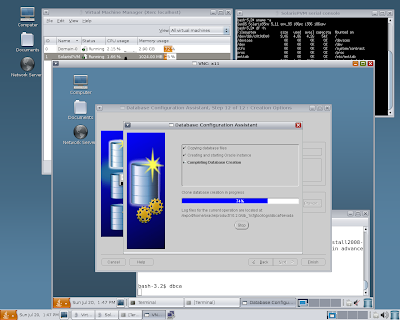
Run "dbca" and create database SNV93 (as referenced by ORACLE_SID)
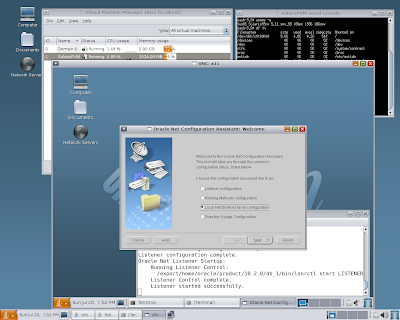
Run "netca" to create LISTENER process and perform Local names resolution creating files listener.ora and tnsnames.ora under $ORACLE_HOME/network/sdmin.
-bash-3.2$ cat listener.ora
# listener.ora Network Configuration File: /u01/app/oracle/product/10.2.0/db_1/network/admin/listener.ora
# Generated by Oracle configuration tools.

SID_LIST_LISTENER =
  (SID_LIST =
    (SID_DESC =
      (SID_NAME = PLSExtProc)
      (ORACLE_HOME = /u01/app/oracle/product/10.2.0/db_1)
      (PROGRAM = extproc)
    )
  )

LISTENER =
  (DESCRIPTION_LIST =
    (DESCRIPTION =
      (ADDRESS = (PROTOCOL = TCP)(HOST = Solaris94PV)(PORT = 1521))
      (ADDRESS = (PROTOCOL = IPC)(KEY = EXTPROC0))
    )
  )


-bash-3.2$ cat tnsnames.ora
# tnsnames.ora Network Configuration File: /u01/app/oracle/product/10.2.0/db_1/network/admin/tnsnames.ora
# Generated by Oracle configuration tools.

SNVDATA =
  (DESCRIPTION =
    (ADDRESS_LIST =
      (ADDRESS = (PROTOCOL = TCP)(HOST = Solaris94PV)(PORT = 1521))
    )
    (CONNECT_DATA =
      (SERVICE_NAME = SNVDATA)
    )
  )

EXTPROC_CONNECTION_DATA =
  (DESCRIPTION =
    (ADDRESS_LIST =
      (ADDRESS = (PROTOCOL = IPC)(KEY = EXTPROC0))
    )
    (CONNECT_DATA =
      (SID = PLSExtProc)
      (PRESENTATION = RO)
    )
  )
Modify file /var/opt/oracle/oratab and change "N" to "Y".
Restart database.
$ emctl stop dbconsole
$ dbshut
$ lsnrctl stop
$ lsnrctl start
$ dbstart
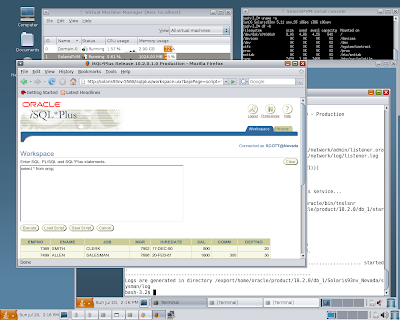
$ isqlplusctl start
$ emctl start dbconsole
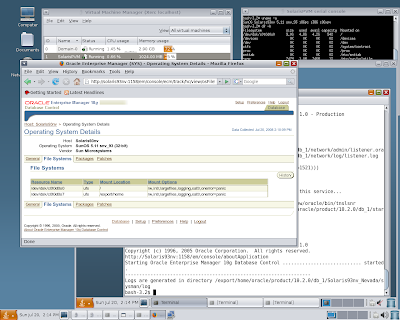
Modify /etc/hosts at Dom0 and launch browser at Dom0 to
http://Server93pv:1158/em/
References
1.http://oracle-base.com/articles/10g/OracleDB10gR2InstallationOnSolaris10.php
2.http://opensolaris.org/jive/thread.jspa?messageID=237405


