Cygwin/X install Oracle 10.2.0.1 on OpenSolaris (build 75a) DomU at Linux Dom0 (64 bit)
Starting with Solaris Express build 75(75a) xVM/Xen are included as a standard part of Solaris Express for x86/x64. Oracle's installation procedure
seems to be a kind of evaluation performance and reliability for
next generation Solaris Xen Drops running as DomUs on top of Linux Dom 0.
Preferably CentOS 5 (RHEL 5) or Debian Etch 4.X.
Remote Oracle install has been performed due to ongoing issue with
setting up VNC on OpenSolaris (75a) DomUs at Linux Dom0
Installing the Cygwin/X X Window System per Jason Liu (University of Minnesota)
Obtaining the Installation Executable
1. Go to http://www.cygwin.com/.
2. Click on the navigation link to go to the “Cygwin/X Home.”
3. Somewhere on the main content of the Cygwin/X home page, there should be a Cygwin icon with the caption “Install Cygwin/X now.” Click on the link.
4. You will be prompted by your browser whether to open the file or save it. Choose to save the file, and save it to somewhere convenient, such as on your Desktop. You will delete this executable file after you are finished with the installation.
5. Double-click on the “setup.exe” that you just saved to start the installation process.
Installing Cygwin/X
1. The initial introduction dialog box for the Cygwin Setup will appear. Simply click the “Next >” button.
2. The next screen will ask you to Choose a Download Source. Make sure the “Install from Internet” choice is selected, and click the “Next >” button.
3. Now, you will be asked to Select Root Install Directory. The root directory should be something like “C:\cygwin” or “C:\Cygwin”. It is best to keep the root directory here.1 You should also decide whether to install Cygwin/X for all users, or just yourself. However, it is best to leave the Default Text File Type as “Unix / binary”. Click the “Next >” button.
4. The next dialog box will as for you to Select Local Package Directory. It is recommended that you choose the same location as where you saved the “setup.exe” installation executable, because you will be deleting this local package directory after you finish installing Cygwin/X. Click the “Next >” button.
5. At the screen titled Select Your Internet Connection, the default setting of “Direct Connection” should be fine, unless you use HTTP Proxies on your computer (most computers do not use proxies). Simply click the “Next >” button.
6. The next screen will ask you to Choose A Download Site. Choose one which seems to be reasonably close (i.e. in North America) — for instance, you probably will not want to choose any sites which end in .de or .au, as these websites are located in Germany and Australia, respectively. (Usually, the planetmirror.com site is reasonably fast. It should be near the bottom of the list.) Then, click the “Next >” button.
7. Now you will be prompted to Select Packages that you want to install as a part of Cygwin/X. This is quite possibly the most important step, as it determines how Cygwin/X will function. The instructions provided here will give you a minimal fully functioning Cygwin/X X server. Note that if you can also repeated click on
the circular double-arrow symbol next to the “Default” text (located next to each category name) in order to cycle through the four choices of “Default”, “Install”, “Reinstall”, and “Uninstall”. In general, you should leave the setting at “Default” and choose the packages individually.2
a. Click on the @ symbol next to the X11 category to expand it. Scroll down to the package that is called xorg-x11-base. Click the circular double-arrow symbol next it once3 so that the text changes from “Skip” to a version number. Note that if there are other packages that are directly related, they will automatically be selected as well. After selecting the package, click the @ symbol next to the X11 category to collapse the category back down.
b. Expand the Net category. Select the openssh package – this will allow you to run things like the SSH client and SFTP client.
c. Click on the @ symbol next to the Editors category to expand it. Choose a text editor that you are familiar with in case you wish to edit some of your Cygwin/X configuration files after installation. All of these text editors are the same as ones that you would find on most UNIX or Linux machines. Some popular choices include VIM, Emacs, X-Emacs, or N-Edit. Choose the text editor(s) that you wish to install, then click the @ symbol next to the Editors category to collapse the category back down.
While the above are the minimal packages that should be selected in order to have Cygwin/X run properly, you can see that there are many other optional packages that can be installed with CygwinX. The selection of these additional packages is not strictly needed, and is beyond the scope of this document. When you are finished selecting all of the packages that you wish to install as a part of Cygwin/X, click on the “Next >” button to begin the automated installation.
8. Now, you simply wait for Cygwin/X to install. First, compressed versions of all of the packages that you selected will downloaded to a Windows folder that you chose to be your Local Packages Directory. Then, the packages will be uncompressed and installed. When the installation is complete, you will get a dialog box that asks whether you would like to install a desktop icon and Start menu icon — the check boxes are selected by default. Simply click the “OK” button, and the next dialog box that pops up says “Installation Complete!” Simply click the “OK” button. Now you are ready to run Cygwin/X. However, there is one thing that should be done manually to make running the X Windows System as easy as possible.
Install OpenSolaris (75a) DomU at Linux Dom0 has been done exactly as in [1].
Tuning OpenSolaris (75a) DomU for Oracle installation procedure performed
as usual. View [2] for example.
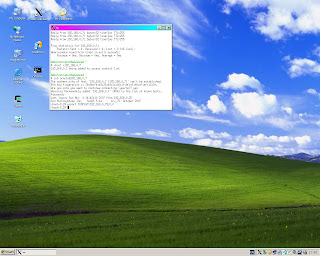
1. Start X11 Server on remote Windows XP desktop
and issue in X-Window:-
# xhost +<IP address of OpenSolaris DomU>
# ssh oracle@<IP address of OpenSolaris DomU>
[oracle@ServerSNV75A]$ export DISPLAY=<IP address of Windows XP desktop>:0.0
[oracle@ServerSNV75A]$ cd /Install/database
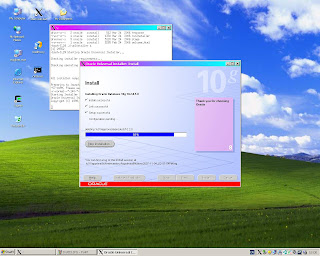
[oracle@ServerSNV75A]$ ./runInstaller &
Another option is to enable ssh "X11 forwarding" on OpenSolaris DomU by
editing /etc/ssh/ssh_config:-
ForwardX11 yes
and running
# svcadm restart network/ssh:default
Then issue in X-Window at Cygwin/X desktop:-
# xhost  +<IP address of OpenSolaris DomU>
# ssh  -X   oracle@<IP address of OpenSolaris DomU>
[oracle@ServerSNV75A]$ cd /Install/database
[oracle@ServerSNV75A]$ ./runInstaller &
In this case you don't have to export DISPLAY environment variable.
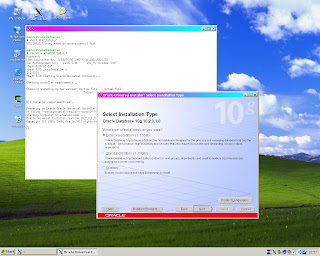
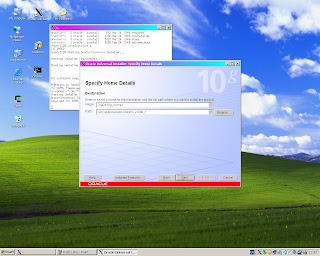
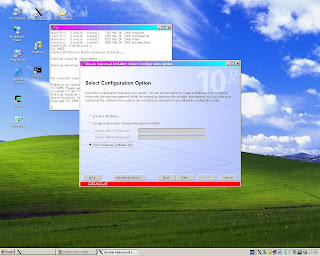
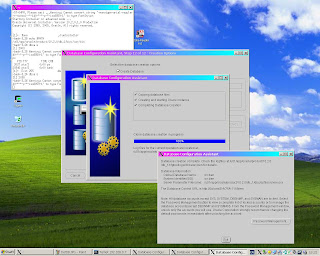
Restart Installer in advanced mode and select "Install Database Software Only" option:-
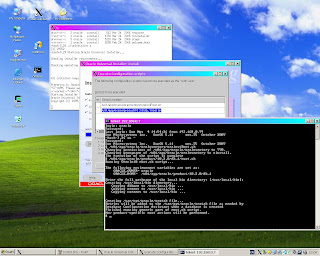
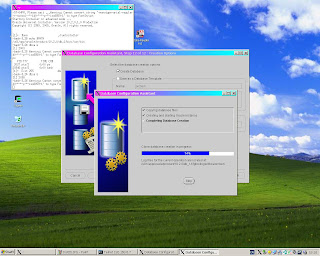
Run "dbca" and create database:-
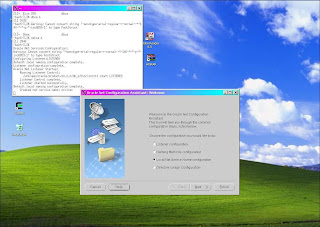
Run "netca" to create LISTENER and perform Local Net Service Name Configuration:-
Next run on Soalaris DomU:-
[oracle@SolarisSNV75A]$ vi /var/opt/oracle/oratab
To replace "N" by "Y" at the end unique entry line
[oracle@SolarisSNV75A]$ emctl stop dbconsole
[oracle@SolarisSNV75A]$ dbshut
[oracle@SolarisSNV75A]$ lsnrctl stop
[oracle@SolarisSNV75A]$ lsnrctl start
[oracle@SolarisSNV75A]$ dbstart
[oracle@SolarisSNV75A]$ isqlplusctl start
[oracle@SolarisSNV75A]$ emctl start dbconsole
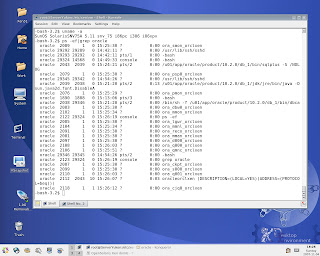
Solaris (SNV 75a) console during Installer run:-

Solaris (SNV 75a) console during "DBCA" run:-
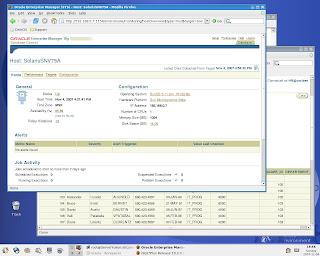
OS detection by Oracle Enterprise Manager Console running at Linux Dom0 side:-