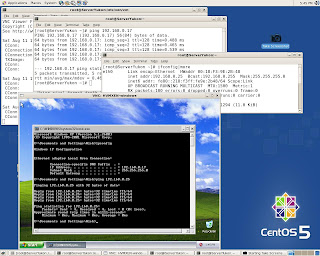
Xen 3.1 Binary installation on CentOS 5.0 & ASUS P5B Deluxe
Perform Xen 3.1 binary download from following location :-

Try "http://xen.xensource.com/download/dl_31tarballs.html" if mentioned URL doesn't work.
Attempt to use compiled binaries might fail sooner or later due to hardware issues.
Fortunately, 2.6.18-xen kernel does understand the hardware assembled
on ASUS P5B Deluxe and Marvell Yukon Gigabit Ethernet in particular. Actually, it means that any board based on (I965+ICH8R) or (I975+ICH7R) would be in general OK for Xen 3.1 Binary installation , but might have trouble with Ethernet Adapter. The first example is Atansic Gigabit Eternet on ASUS P5B-E. This board would require xen kernel source to compile Atansic Ethernet Driver.
Install bridge-utils-XXXX-x86_64.rpm if needed.
cd /tmp
tar –xzvf xen-3.1.0-install-x86_64.tgz
The tar command will create a directory named "dist"
# cd dist
Place all of the Xen files into their places in the file system by running
# sh ./install.sh
Determine the name of the Xen Linux kernel version that was installed.
# ls /lib/modules
There should be a directory for the Xen Linux kernel (e.g., 2.6.18-xen)
Generate the module dependency list and map files
# /sbin/depmod 2.6.18-xen
Create the Xen initial ramdisk image
# /sbin/mkinitrd /boot/initrd-2.6.18-xen.img 2.6.18-xen
Disable tls
# mv /lib64/tls /lib64/tls.disabled
Set xend service to start
# /sbin/chkconfig --add xend
# /sbin/chkconfig xend on
Edit /boot/grub/grub.conf and copy one of the existing boot entries to make the required changes for Xen.
title Xen-3.1 x86_64  (2.6.16-xen)
root (hd0,2)
kernel /xen-3.1gz
module /vmlinuz-2.6.18-xen ro root=/dev/VolGroup00/LogVol01 rhgb quiet
module /initrd-2.6.18-xen.img
Reboot into new kernel and start network bridge.
# /etc/xen/scripts/network-bridge start netdev=eth0
System and Windows 2000 VM configuration:-

Perform HVM Windows 2000 VM install utilizing ISO image of distribution CD
already copied by "dd" to SATA hard drive.
Set boot="d" in VM's profile (w2k0.hvm) and proceed:-
# /usr/sbin/xm create w2k0.hvm
# vncviewer localhost::5900

Now set boot="c" in VM's profile (w2k0.hvm) :-
# /usr/sbin/xm create w2k0.hvm
# vncviewer localhost::5900

# /usr/sbin/xm create w2k0.hvm
# vncviewer localhost::5900


Windows XP VM installation procedure is quite similar
Network Bridge verification for Windows XP VM:-
